
Why Your Basement Sounds Like a Cave (And What to Do About It)
Basement sound dampening is the process of reducing echoes and reverberation inside your basement so that noise feels controlled rather than chaotic. Here’s a quick breakdown of what actually works:
Quick answer — the most effective basement sound dampening methods:
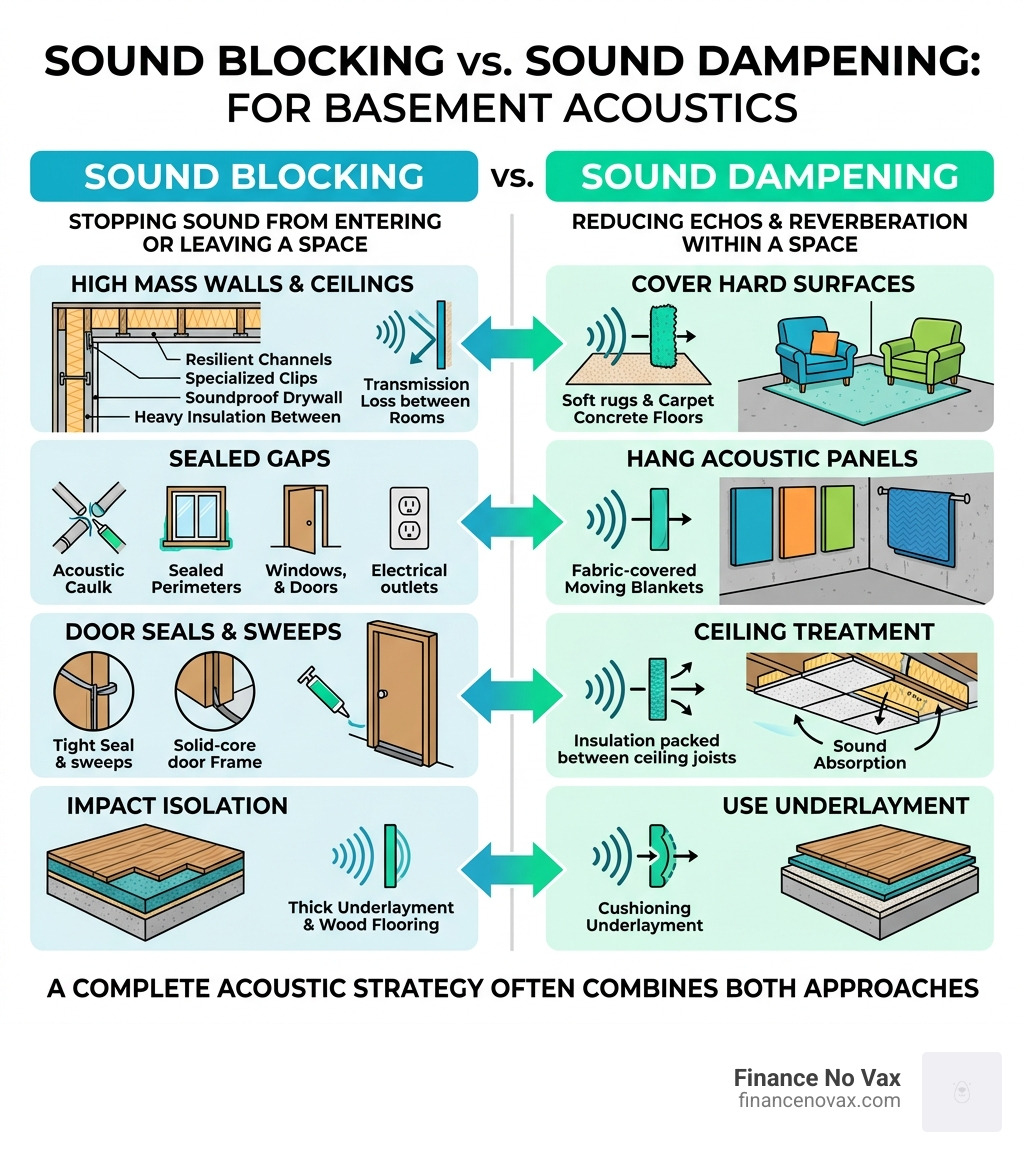
- Cover hard surfaces — rugs, carpet, and soft furnishings absorb sound bouncing off concrete
- Hang acoustic panels or moving blankets on walls to kill echo
- Add ceiling treatment — acoustic tiles or insulation between joists cuts noise from above
- Seal all gaps — acoustic caulk around pipes, vents, and outlets stops sound from leaking
- Use underlayment beneath any flooring to reduce impact noise and vibration
If you’ve ever tried to take a Zoom call in your basement and felt like you were speaking inside a parking garage, you already know the problem.
Bare concrete walls. Hard tile or unfinished floors. Low ceilings with exposed joists. These surfaces don’t absorb sound — they throw it right back at you. Every voice, keyboard click, or footstep from upstairs gets amplified and bounced around until the noise becomes genuinely exhausting.
And the stress is real. Studies show that 55% of adults report feeling stressed throughout their day — and a noisy, echoey workspace makes that significantly worse.
The good news? You don’t need a full renovation to fix it. The right combination of materials and placement can transform even the harshest concrete basement into a calm, focused workspace.
This guide walks you through exactly how to do that — from cheap DIY hacks to more serious acoustic treatments — so you can stop fighting your basement and start actually getting work done.
Relevant articles related to basement sound dampening:
Soundproofing vs. Basement Sound Dampening: Knowing the Difference
Before we grab the hammer and acoustic caulk, we need to clear up a common misunderstanding. In acoustics, “soundproofing” and “sound dampening” are often used interchangeably, but they are very different tools in our toolkit.
Soundproofing (Transmission Blocking) is about stopping sound from entering or leaving a room. If you want to play the drums at 2:00 AM without waking your neighbors, you need soundproofing. This requires adding mass (like thick drywall), decoupling (separating wall structures), and sealing every single air gap.
Basement sound dampening (Absorption) is about improving the sound quality inside the room. It’s about killing that “cave” echo. When we dampen a room, we use porous materials to soak up sound waves so they don’t bounce off the walls.
To measure how well a material blocks sound, we look at the STC (Sound Transmission Class) rating. A standard interior wall usually has an STC of around 35. For a home theater or music studio, we aim for 50 or even 60+. On the other hand, the NRC (Noise Reduction Coefficient) measures how much sound a material absorbs. An NRC of 0 means the material reflects all sound (like concrete), while an NRC of 1.0 means it absorbs it all (like a thick acoustic panel).
In a basement, we usually need a bit of both. We want to dampen the echoes from the concrete walls and soundproof the ceiling to stop the “thump-thump” of footsteps from the kitchen above. For a deeper dive into the structural side, check out The Ultimate Guide To Soundproofing Your Walls.
Strategic Basement Sound Dampening for Ceilings and Walls
Basements present unique challenges because they are essentially concrete boxes. Concrete is one of the most reflective materials used in home construction. It doesn’t just bounce sound; it creates a high-frequency “zing” that can make even a quiet conversation feel piercing.
Then there are the mechanical culprits. Most basements house the HVAC unit and a maze of plumbing pipes. These act like a built-in speaker system, carrying vibrations and “whooshing” water sounds throughout the house.
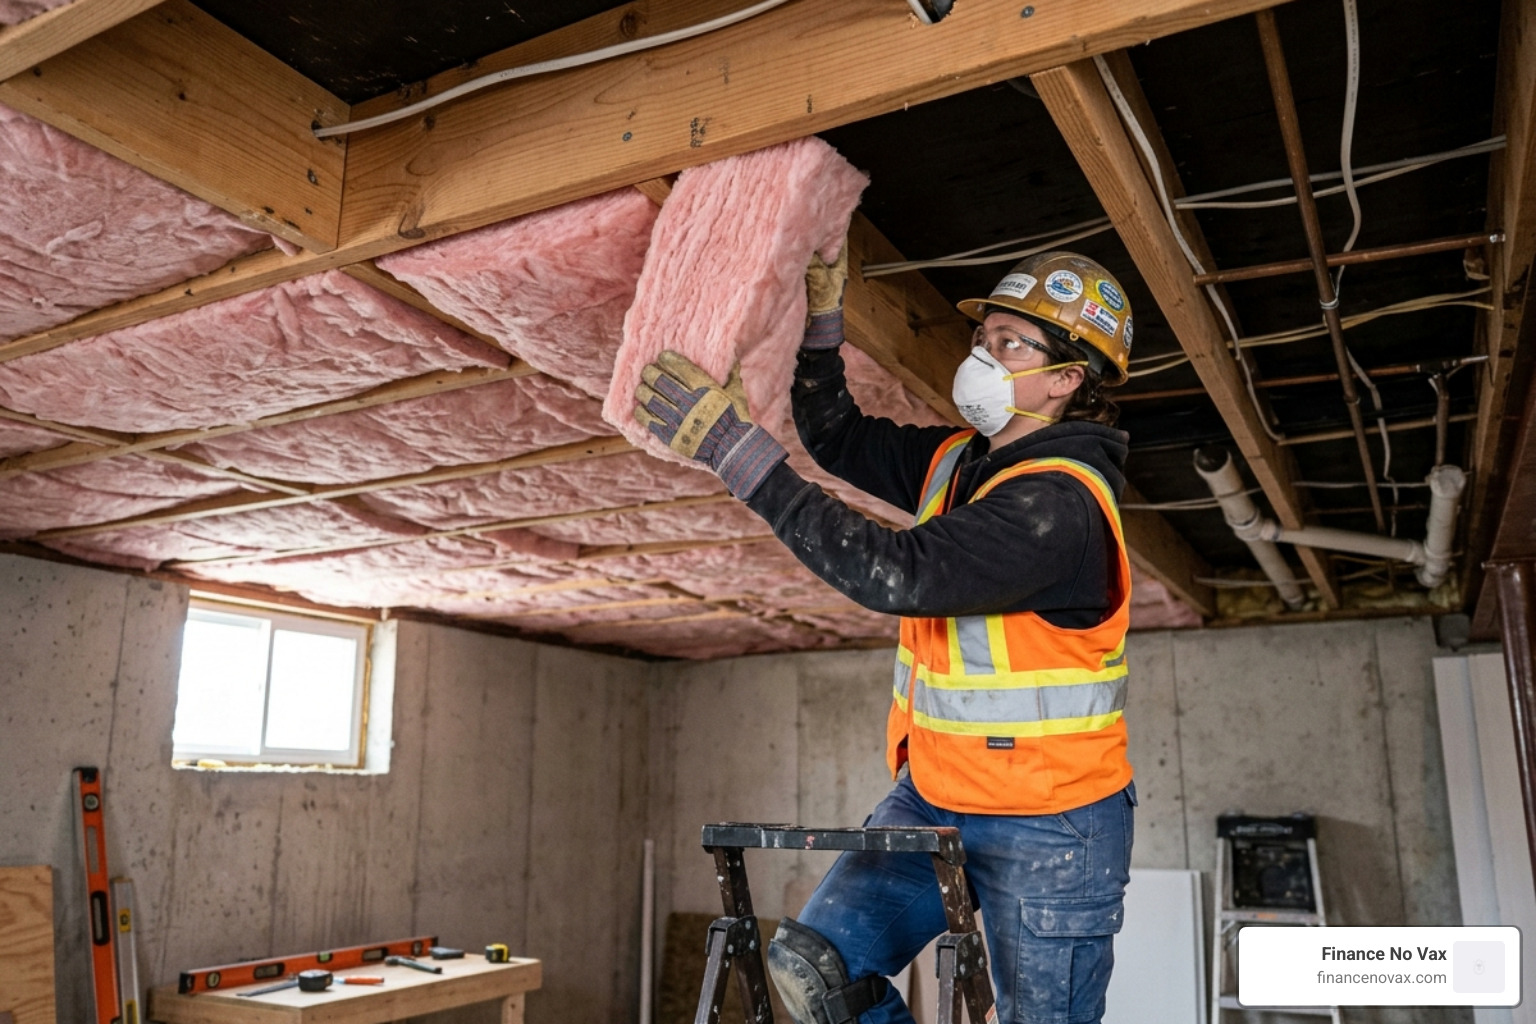
The “gold standard” for treating these issues is Rockwool (mineral wool) insulation. Unlike standard fiberglass insulation, which is great for heat but mediocre for sound, Rockwool is incredibly dense. When properly installed within standard 2×4 or 2×6 framing, it can achieve an STC rating of 45–50. This is enough to block most household noises, including voices, TVs, and music.
If you are looking for the absolute best way to fill your walls, read our guide on Rockwool Or Bust Finding The Best Insulation For Your Studio Walls.
Treating the Ceiling for Impact Noise
The basement ceiling is usually the biggest sound leak in the house. Because the floor of the upstairs is directly attached to the joists of the basement ceiling, every footstep travels through the wood as a vibration. This is called impact noise.
To fix this, we need to decouple. This means breaking the physical connection between the upstairs floor and the basement ceiling. We do this using resilient channels or sound isolation clips. These metal tracks are attached to the joists, and the drywall is then attached to the tracks. This creates a “floating” ceiling that vibrates independently, preventing the “thump” from traveling through.
For maximum results, we recommend:
- Filling the joist cavities with Rockwool.
- Installing resilient channels.
- Adding two layers of 5/8″ fire-rated drywall with a layer of Green Glue (a damping compound) sandwiched between them.
This combination can boost your total sound transmission loss by up to 15–20 dB, turning a noisy basement into a quiet oasis.
Effective Basement Sound Dampening for Home Offices and Studios
If you’re setting up a home office or a recording space, you need to focus on diffusion and absorption.
- Acoustic Panels: These should be placed at “first reflection points”—the spots on the walls where sound from your speakers or voice hits first.
- Bass Traps: Low-frequency sounds (bass) tend to gather in corners. Placing thick foam or mineral wool traps in the corners prevents the room from sounding “boomy.”
- Room-within-a-room: For those building a professional-grade studio or a drum room, this is the ultimate move. It involves building a second set of walls that don’t touch the original foundation. It’s a big project, but it’s the only way to achieve near-total silence.
For drummers specifically, we’ve put together some lifesaving tips in Basement Drum Room Build Suggestions For Happy Neighbors and Finding The Best Drum Isolation Booth To Save Your Marriage.
Low-Cost and DIY Materials for Maximum Absorption
We know that a full-scale acoustic renovation isn’t in everyone’s budget for 2026. If you’re looking for basement sound dampening on a dime, you can get surprisingly good results with everyday materials.
| Material | Effectiveness | Best Use |
|---|---|---|
| Moving Blankets | High | Hanging on walls to kill echo |
| Carpet Remnants | Medium-High | Floor coverage or wall strips |
| Corrugated Cardboard | Low-Medium | DIY diffusers (best for drums) |
| Egg Crates | Very Low | Myth! They don’t block sound, only slightly diffuse high frequencies. |
| Mattress Toppers | Medium | Temporary wall padding |
| Heavy Curtains | Medium | Covering windows or dividing rooms |
The Cardboard Secret: Interestingly, some drummers swear by corrugated cardboard. While it doesn’t block sound from leaving the room, the air pockets in the cardboard can absorb harsh high-frequency reflections and actually make drums sound warmer and “booming” in a good way.
If you want to learn more about the science of double walls without the professional price tag, check out Double Wall Soundproofing Is The Secret To A Silent Home.
Budget-Friendly Basement Sound Dampening Hacks
You don’t always need to buy “acoustic” products. Much of basement sound dampening is just about smart interior design.
- Furniture Placement: A large, fabric-covered sofa or a bookshelf filled with books acts as a natural sound absorber and diffuser. Break up those flat, hard wall surfaces!
- Acoustic Caulk: This is the “unsung hero” of soundproofing. Standard silicone caulk hardens and cracks over time. Acoustic caulk stays flexible, meaning it continues to block air (and sound) leaks for years. Seal around every outlet box and pipe penetration. Even a single unsealed vent can reduce your soundproofing effectiveness by 50%.
- Door Sweeps and Seals: Most basement doors are hollow-core, which are basically “drums” that let sound through. If you can’t replace it with a solid-core door, add a heavy door sweep and weatherstripping around the frame to create an airtight seal.
- Rugs and Underlayment: If you have a concrete floor, a thick rug is mandatory. For extra credit, put a rubberized acoustic underlayment beneath the rug. This helps dampen the “slap” of footsteps on the floor.
For more room-specific tips, see our guide: Wall To Wall Quiet Your Guide To Soundproof Walls In The Living Room.
Installation Guide and Moisture Management
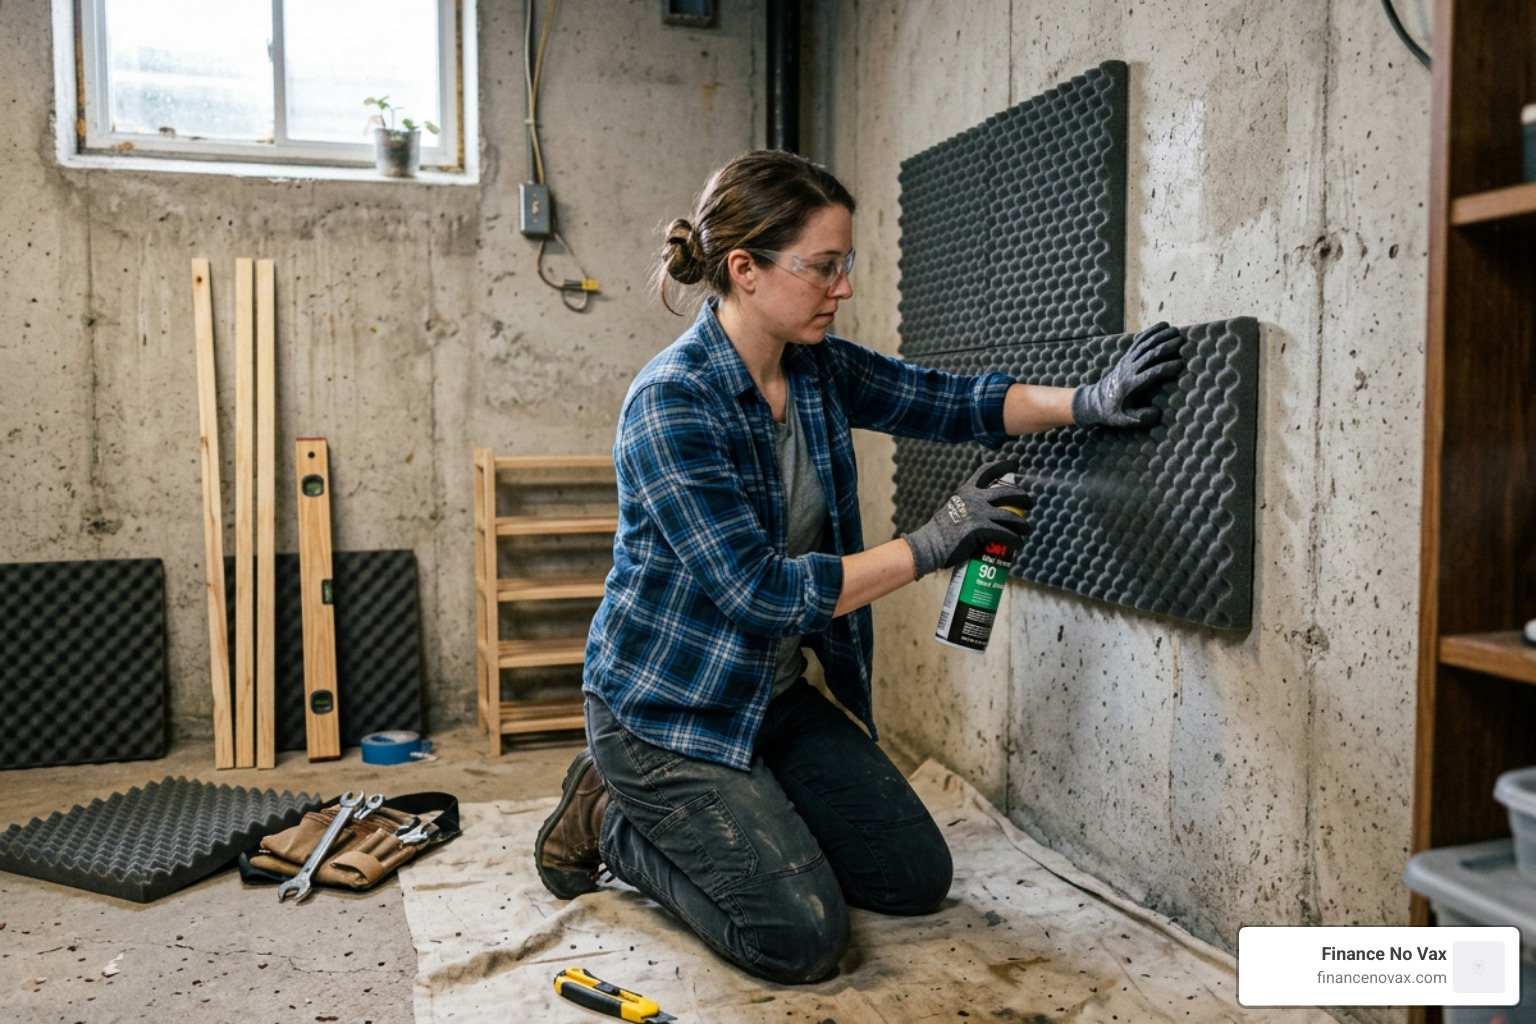
Basements are notorious for humidity. This is the one area where you cannot cut corners. If you install standard acoustic foam directly onto a damp concrete wall, you are creating a five-star hotel for mold.
Step-by-Step: Installing Acoustic Panels Safely
- Test for Moisture: Tape a piece of plastic wrap to your basement wall for 24 hours. If condensation forms behind it, you have a moisture problem that needs to be solved with a dehumidifier or waterproofing paint before you add sound materials.
- Use an Air Gap: When mounting panels or foam, try to leave a small gap (using 1×3 wood furring strips) between the material and the wall. This allows air to circulate and prevents moisture buildup.
- Choose Moisture-Resistant Materials: Products like WPC (Wood Plastic Composite) panels or PET-based acoustic felt are naturally resistant to mold and rot, making them ideal for basements.
- Adhesive vs. Mechanical Fastening: In a humid basement, self-adhesive foam often peels off. We recommend using a high-quality construction adhesive or even small finishing nails to ensure your panels stay put.
The Thermal Bonus
One of the best side effects of basement sound dampening is energy efficiency. Materials like Rockwool and thick acoustic panels also act as excellent thermal insulators. By treating your basement for sound, you’re also making it easier to keep warm in the winter and cool in the summer, which is a win for your utility bill!
Frequently Asked Questions about Basement Sound Control
How do I calculate how much treatment coverage my basement needs?
For general basement sound dampening (reducing echo), you don’t need to cover every inch of the walls. A good rule of thumb is to cover 20% to 30% of the total wall surface area. If the room is still too echoey, you can increase this to 40%. For a 200-square-foot room with 8-foot ceilings, that means you’d want roughly 130 to 190 square feet of absorbent material spread across the walls and ceiling.
Can sound dampening materials also improve energy efficiency?
Yes! As mentioned above, most acoustic insulation (especially mineral wool and cotton-fiber batts) has a high R-value. This means it resists heat flow. By stuffing your joists and walls with sound-dampening materials, you are effectively “wrapping” your basement in a thermal blanket.
How do I test if my sound dampening is actually working?
You don’t need fancy equipment to do a basic test.
- The Clap Test: Walk around the room and clap your hands loudly. In an untreated basement, you’ll hear a sharp “ring” or “flutter” echo. In a dampened room, the sound should be “dry” and stop almost instantly.
- The Recording Test: Record yourself speaking on your phone in the middle of the room. Listen back for “roominess” or echo.
- Decibel Meter Apps: Use a free smartphone app to measure the noise level while someone walks upstairs. Compare the readings before and after you install your ceiling treatments.
Conclusion
Mastering basement sound dampening is about more than just peace and quiet—it’s about reclaiming a part of your home. Whether you’re building a professional studio or just trying to survive a day of remote work, the effort you put into acoustics pays off in reduced stress and increased focus.
By combining mass (to block sound), decoupling (to stop vibrations), and absorption (to kill echoes), you can turn a cold concrete box into a warm, inviting space. Start with the basics: seal the gaps, throw down some rugs, and treat the ceiling joists. You’ll be surprised at how much difference even a few small changes can make.
For more expert advice on transforming your home’s acoustics, visit Finance No Vax for our latest guides and tutorials. Your ears (and your family) will thank you!
