How to Draw Lavender: Simple Sprigs and Bunches
Draw a lavender sprig from one curved stem, a narrow tapered guide and small teardrop buds in stacked rings, then cross several sprigs at a tie point to make a bunch.
Tutorial at a glance
What you need
- HB pencil
- 2B pencil
- Kneaded eraser
- Pencil sharpener
- Sketchbook or drawing paper
Lavender is made of one long line and a lot of small, repeated marks. There are no big petals to shape and no tricky overlaps, which makes it a calm subject for a first plant drawing and a useful one for filling the edge of a sketchbook page.
The method below for how to draw lavender starts with a single curved stem, marks out the flower spike with a narrow guide, and then fills that guide with tiny buds in stacked rings. Once one sprig works, a tied bunch is only a matter of repeating it.
How a lavender sprig is built
Lavender carries its small buds in stacked rings on a spike at the top of a thin stem. Between one ring and the next there is usually a small gap where the stem shows through. The rings are largest at the bottom of the spike and shrink to a point at the tip.
The leaves are narrow and sit low on the stem in pairs, one on each side. The upper part of the stem below the spike is bare. Keeping that stretch empty is what makes a sprig look tall and elegant.
Step 1: the stem
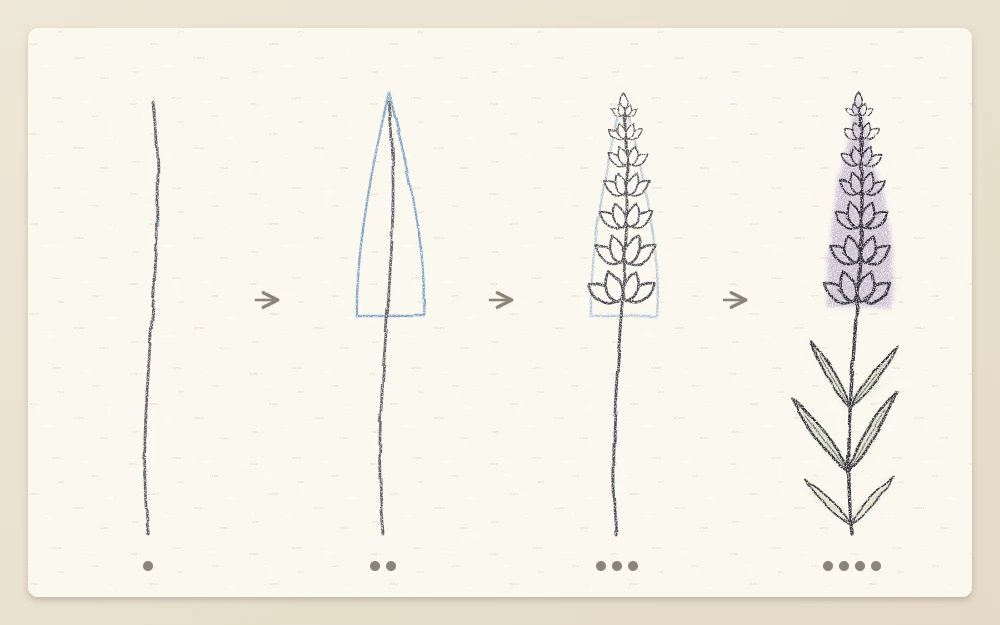
With an HB pencil and light pressure, draw one long line about 6 in (15 cm) tall. Start at the bottom and pull it upward in a single stroke, letting it lean slightly to one side and curve gently near the top, as if the tip were just heavy enough to bend it.
Avoid a ruler-straight line. For more on line quality and thickness here, see how to draw flower stems that look natural.
Step 2: the tapered spike guide
Divide the stem into thirds by eye and work on the top third only. Around that part of the stem, draw a narrow construction shape like a long, slim candle flame: pointed at the top, widest about a quarter of the way up from its base, and rounded at the bottom.
At its widest, the guide should be about one-sixth as wide as it is long. Keep the stem running through the middle of it as a center line. Press lightly, because most of this guide will be erased.
Step 3: buds in stacked rings
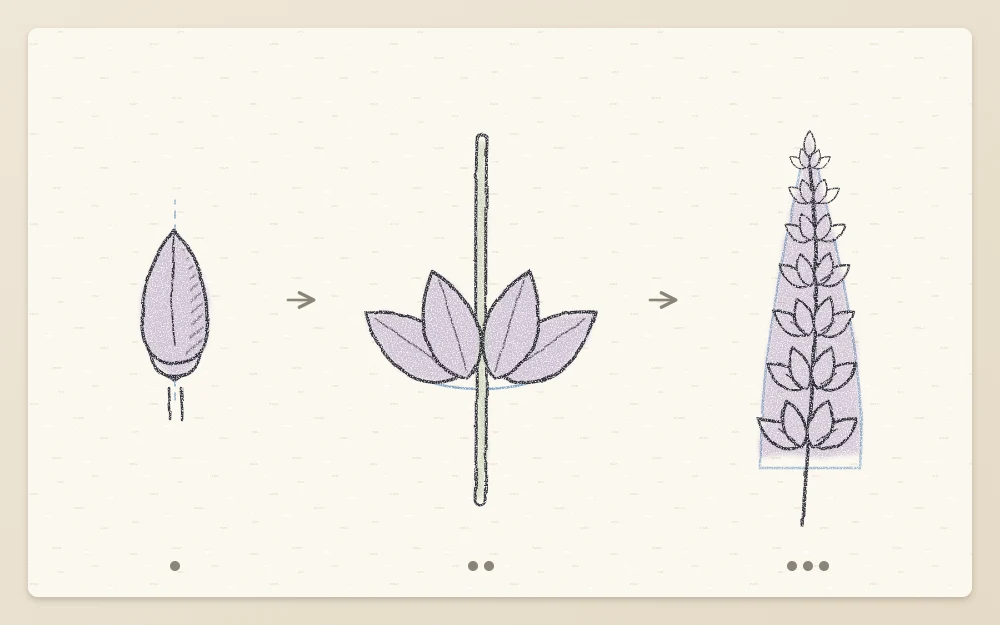
The building block is a single teardrop bud: rounded at the outer end, pointed where it joins the stem, and about as long as the guide is wide at that height. Draw the buds with a 2B pencil and moderate pressure.
- Start with the lowest ring. Draw one bud on the left of the stem and one on the right, each angled upward and outward at roughly 45 degrees, with its point touching the stem.
- Add two more buds between them, in front of the stem, so they partly cover it. From the front, a ring reads as about four buds.
- Leave a gap about half a bud tall, then draw the next ring the same way, slightly smaller.
- Continue up the guide: six to eight rings in all, each a little smaller than the one below, with the outer buds just touching the edge of the guide.
- Near the tip, drop to two buds per ring, then finish with one or two tiny buds pointing straight up.
Tip
On many sprigs the lowest ring sits a little apart from the rest. Leaving a wider gap above the first ring, about one full bud tall, makes the spike look less mechanical.
Step 4: leaves and finishing lines
Lift the tapered guide with a kneaded eraser so only the buds and stem remain. Then go over the stem with the 2B pencil, turning it into two very close lines below the spike and a single line where it passes between the rings.
Add the leaves on the lowest third of the stem. Each leaf is a long, narrow shape, about as long as two rings of buds and barely wider than the stem, with a pointed tip. Draw them in pairs, one each side of the stem at the same height, angled upward. Two or three pairs are enough. A single faint midrib down each leaf is all the detail they need.
To suggest roundness, darken the buds on one side of the spike slightly and leave the other side lighter. Keep it to a few strokes.
From one sprig to a bunch
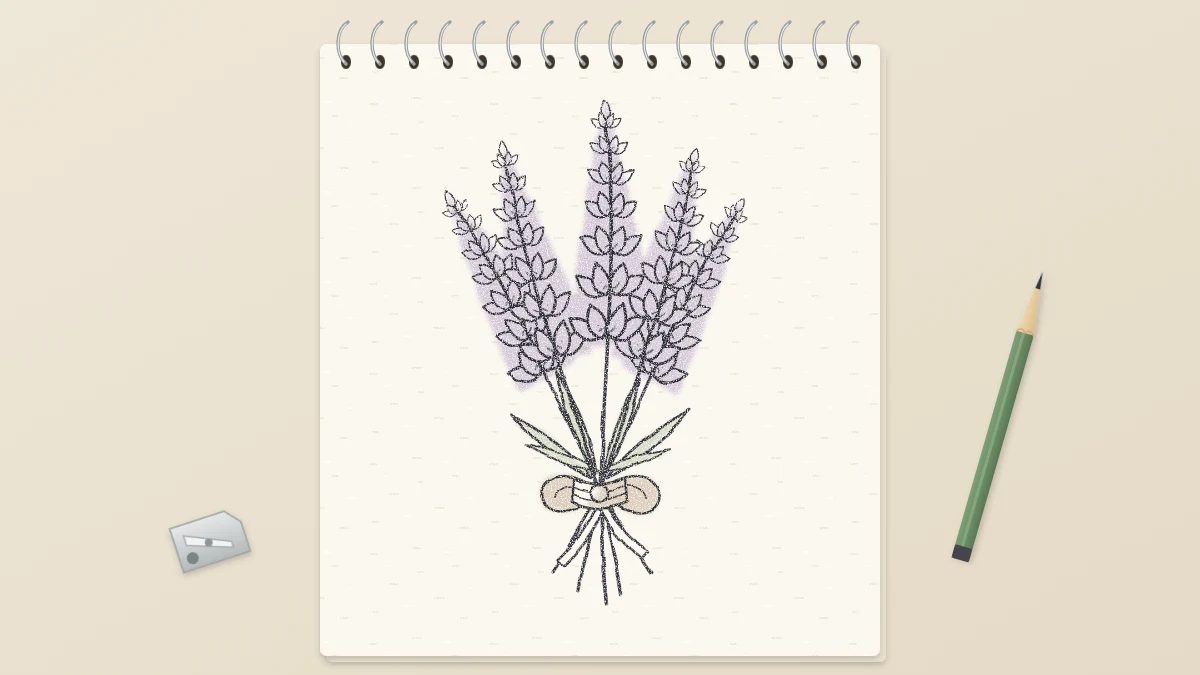
A bunch is several sprigs crossing at one tie point. Mark that point first with a small dot about a third of the way up from the bottom of the page area you plan to use.
- Draw five stem lines that all pass through the dot. Above it they fan out; below it they cross and spread the other way, like a loosely held handful.
- Vary them: make the middle stem the tallest, let the two outer stems curve away from the center, and give each a different height, differing by at least one spike width.
- Add a spike guide to the top third of each stem and fill them with rings as before. Where two spikes overlap, finish the front one and stop the back one at its edge.
- At the tie point, wrap two or three short curved lines across the stems for twine and add a small bow or two loose ends.
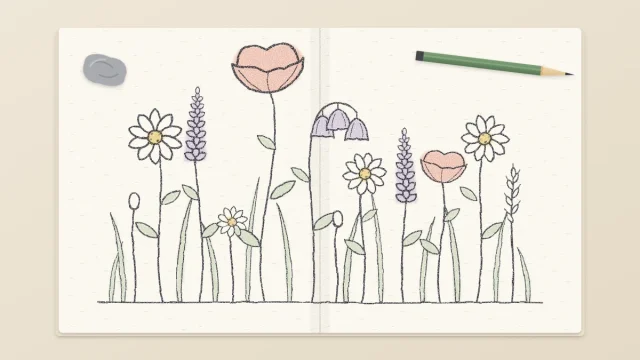
Skip most of the leaves in a bunch; one or two pairs above the tie are enough. A finished bunch also sits well beside other loose plants in a simple meadow sketch of wildflowers, where a spike shape contrasts with round flower heads.
Common problems
- The spike looks like a solid cone: the gaps between rings have closed up. Erase a thin band every ring or two so the stem shows.
- The buds look like scales: they are all the same size and angle. Shrink them toward the tip and tilt the outer ones more.
- The sprig looks stiff: the stem is too straight. Redraw it with one slow curve.
- The bunch looks like a fan: the stems are too evenly spaced. Move two of them closer together and cross one over another.
Results vary with practice, and the fifth sprig usually looks freer than the first. When you want more subjects at this level, browse these easy flower drawing ideas.
Frequently asked questions
Is lavender a good first plant to draw?
It is one of the simpler choices because it has no large petals or complicated overlaps. The whole sprig comes from one stem line and one small teardrop mark repeated many times, so the main skills you practice are a steady curve and consistent, light pressure.
How many buds should each lavender ring have?
From the front, about four buds per ring reads well near the bottom of the spike: one on each side and two in front of the stem. Reduce to two near the top and finish with one or two tiny buds. Exact counts matter less than the gradual change in size.
Can you add color to a pencil lavender drawing?
Yes. A light layer of purple colored pencil over the buds and a soft gray-green on the stems and leaves is enough. Keep the pencil lines visible underneath and leave small specks of white paper between rings so the spike does not turn into a solid block.