How to Draw a Poppy: Papery Petals and a Bold Center
Build a poppy from a tilted bowl shape, add two front petals and the back ones behind them, then finish with fine fold lines, a ribbed seed pod and a ring of stamens.
Tutorial at a glance
What you need
- HB pencil
- 2B pencil
- 4B pencil
- Kneaded eraser
- Pencil sharpener
- Sketchbook or drawing paper
A poppy is one of the most forgiving flowers to sketch. It has only a few large petals, their edges are crinkled rather than crisp, and no two blooms look alike, so a wobbly line usually helps the drawing instead of hurting it.
This guide to how to draw a poppy builds the flower from a tilted bowl, adds the front petals before the back ones, and finishes with the dark center that gives the bloom its punch. Keep every early line light: the HB pencil does the planning and the 2B comes in only at the end.
What to look for in a real poppy
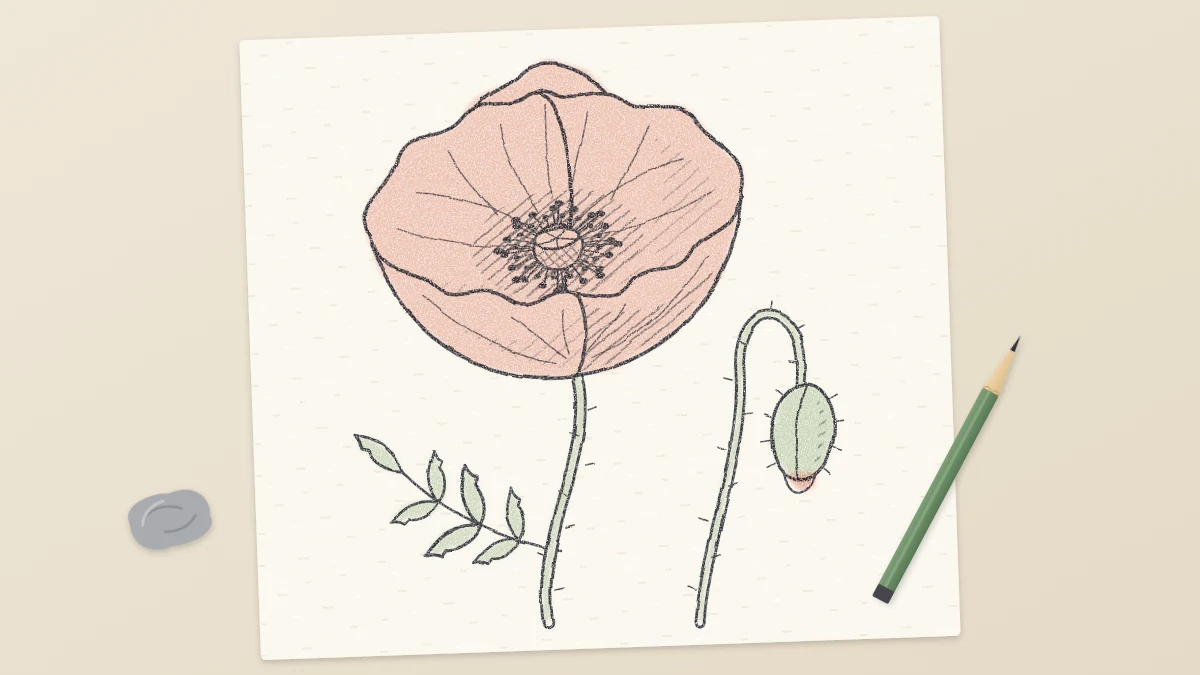
A poppy usually has four to six broad petals arranged around a small round seed pod with a ribbed cap. A ring of many short stamens surrounds the pod. The petals are thin and papery, so they fold, crease and overlap loosely instead of holding a stiff shape.
Seen from slightly above, the whole bloom forms a shallow bowl. That bowl is the construction shape for the entire drawing. If you can, work from a live flower or from photos you took yourself.
Draw the tilted bowl and the stem line
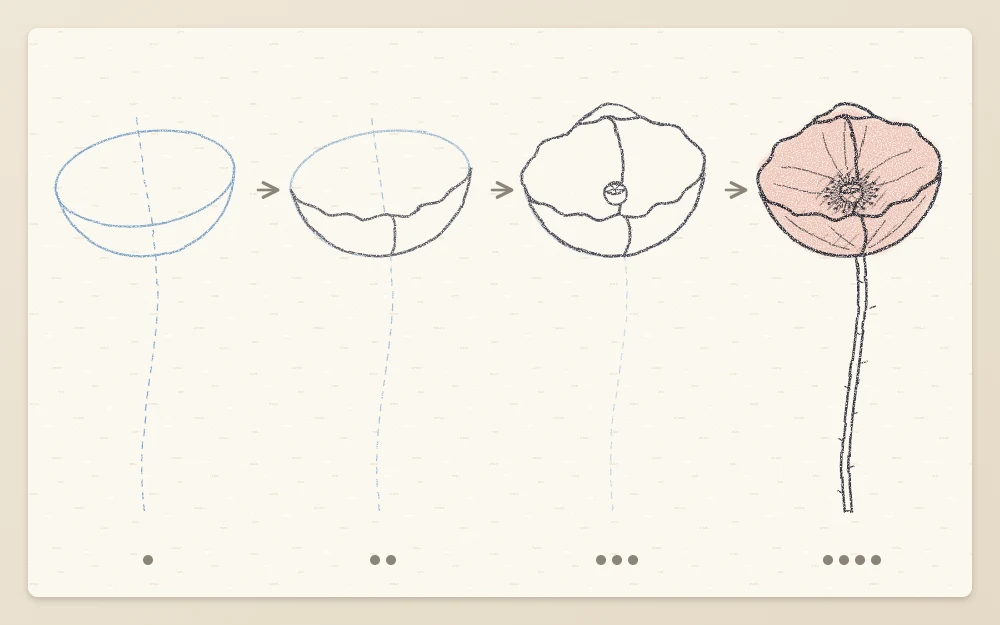
- With an HB pencil and very light pressure, draw an ellipse about 3 in (8 cm) wide and half as tall. Tilt it so the left end sits a little higher than the right. This is the rim of the bowl.
- From the left end of the ellipse to the right end, draw a shallow curve that dips below the rim by about a third of the ellipse’s height. The rim and this curve together make the bowl.
- Inside the ellipse, slightly below its middle, draw a small circle about one-sixth as wide as the ellipse. This marks the seed pod.
- From the lowest point of the bowl, draw a single stem line downward, about twice as long as the bowl is wide. Give it one gentle curve to the right, like a relaxed letter C.
Add the two front petals
The front petals are nearest to you, so drawing them first settles every overlap that follows.
- Start at the left side of the small center circle. Sweep a line out to the left end of the rim, follow the lower bowl curve to just past its midpoint, then return to the bottom of the center circle. The result is a broad fan shape.
- Go over the outer edge of that fan with a wavy, uneven line: three or four shallow bumps of different sizes, with one small dip near the middle.
- Draw the second front petal the same way on the right side, from the center circle out to the right end of the rim. Let its outer edge cross over the first petal by about a quarter of a petal’s width, and stop the first petal’s line where the second one covers it.
If broad shapes like these feel unfamiliar, the guide on drawing single petals from simple shapes covers them one at a time.
Add the back petals and the center
- Behind the center, draw two back petals that rise above the far rim. Each starts at the top of the center circle, swells upward until it stands above the rim by about a third of the ellipse’s height, and comes back down behind a front petal.
- Where the two back petals meet, tuck one behind the other. For a five- or six-petal poppy, slip a narrow extra petal into that gap so only its wavy top edge shows.
- Firm up the seed pod: keep the small circle, then draw a flatter oval across its top like a lid. Add six to eight short lines radiating from the middle of the lid to its edge. This is the ribbed cap.
- Ring the pod with short stamens: fine strokes about as long as the pod is wide, each ending in a tiny dot. Pack them closely and let them lean in different directions.
The pod and stamens are small, but they carry the darkest values in the drawing. For more on building them, see how to draw flower centers.
Fold lines, stem and leaves
Switch to a 2B pencil and redraw the contour of each petal with a slightly heavier line, pressing a little harder where one petal tucks behind another. Lift the bowl guide with a kneaded eraser.
For the papery folds, draw fine lines that start at the base of each petal and radiate toward the edge. Keep them light, uneven in length, and stop most of them halfway. Five to seven per petal is plenty.
Thicken the stem into two close parallel lines, no wider than the seed pod. Add short, fine ticks along both sides for the slightly hairy surface. Near the bottom, draw one or two deeply cut leaves: a midrib about as long as the bowl is wide, with ragged, pointed lobes on each side.
Buds, side views and seed pods
A poppy plant shows several stages at once, and adding one makes a single bloom look like part of a living plant.
- Nodding bud: draw a stem that rises, then hooks over at the top like a cane handle. Hang an oval bud from the hook, about half as long as the open flower is wide, with one seam line down its length.
- Side view: draw the bowl with a nearly flat rim, then wavy petal tops rising above it. The center is hidden.
- Seed pod: after the petals fall, a rounded pod sits on a straight stem with its ribbed cap on top like a small lid.
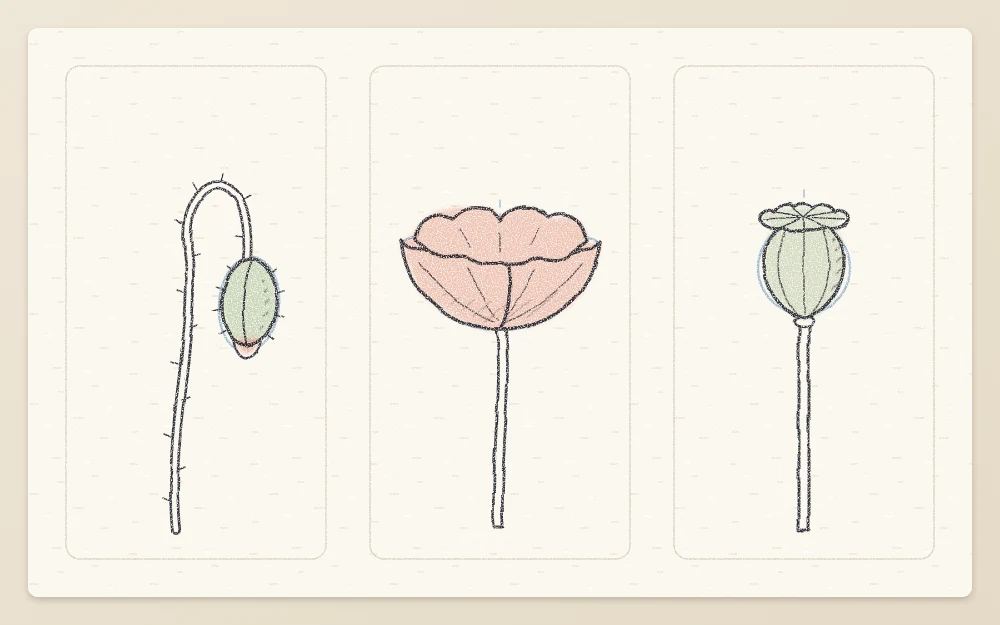
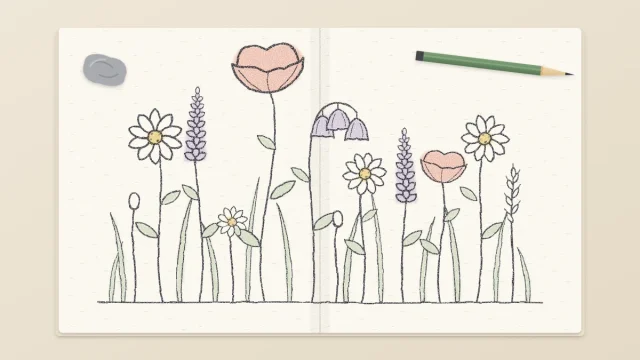
These small studies are also useful fillers when you move on to a loose meadow sketch of mixed wildflowers.
Common problems
Common mistake
Making every petal the same size and spacing them evenly. A poppy looks natural when one front petal is clearly larger and the back petals are partly hidden.
- The flower looks flat: the ellipse was too round. Make it wider and shallower, and let the back petals rise clearly above the rim.
- The petals look stiff: the edge bumps are too regular. Vary their size and add one deeper dip.
- The fold lines look like stripes: they are too dark or too even. Lighten them with a kneaded eraser and shorten every other line.
Results vary with practice, so draw three or four small poppies on one page, changing the tilt of the bowl each time.
Frequently asked questions
How many petals should a poppy drawing have?
Four to six broad petals is the usual range. For a first drawing, four is easiest: two in front and two behind. Adding a narrow fifth or sixth petal peeking out between the back ones makes the flower look fuller without changing the construction.
How do you make poppy petals look thin and papery?
Use a wavy, uneven contour and keep the fold lines fine and light. Start each fold line at the base of the petal and let it fade before it reaches the edge. Heavy, evenly spaced lines make the petal look thick and striped, so vary both length and pressure.
Should the center of a poppy be dark?
Yes, a dark center gives the flower contrast. Keep the top of the seed pod a little lighter so the ribbed cap still shows, and put the darkest value in the ring of stamens around it. A 4B pencil used with gentle pressure is enough.