
Why Easy Room Soundproofing Can Save Your Workday
Easy room soundproofing doesn’t have to mean tearing out walls or hiring a contractor. Here are the fastest ways to get started:
- Seal gaps around doors and windows with weatherstripping and door sweeps
- Add mass to walls using bookshelves, moving blankets, or acoustic panels
- Absorb sound with thick rugs, heavy curtains, and upholstered furniture
- Block door gaps with a door sweep or draft stopper
- Treat windows with heavy acoustic curtains or removable window inserts
You’re on a video call. A neighbor slams a door. A lawnmower starts up outside. Your concentration is gone.
If noise is wrecking your focus at home, you’re not alone. Millions of remote workers deal with exactly this every day.
The good news? You don’t need a full renovation to fix it. Most noise problems come down to a few simple issues — gaps that let sound leak in, and hard surfaces that bounce it around. Both are surprisingly easy to address.
There’s one important thing to understand before you start: not all soundproofing is the same. Blocking sound from entering your room is different from absorbing sound already inside it. You’ll likely need a bit of both — and this guide walks you through exactly how to do that, without breaking the bank or angering your landlord.
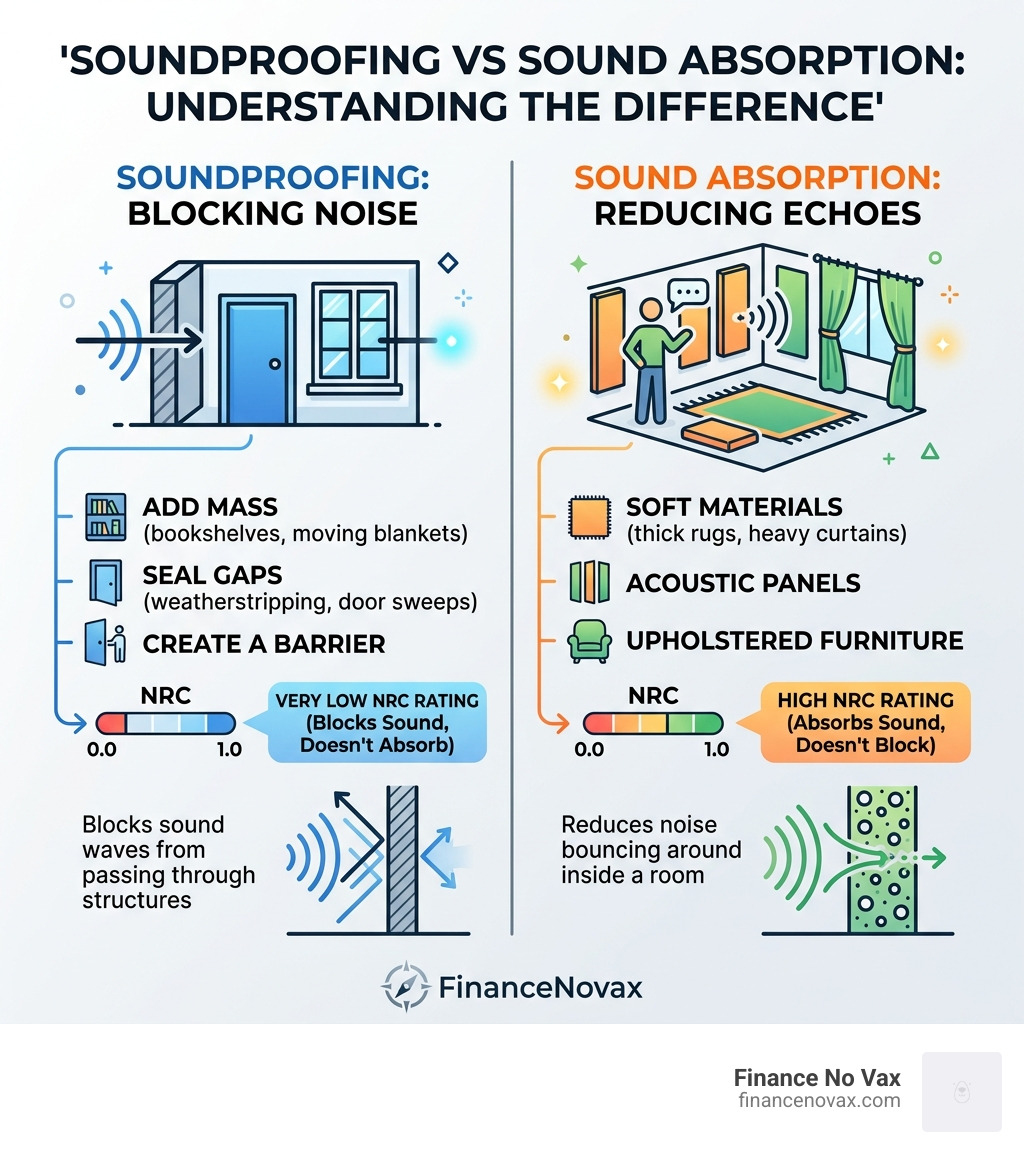
Easy room soundproofing terminology:
Understanding the Basics: Soundproofing vs. Sound Absorption
Before we dive into the “how-to,” we need to clear up a common confusion. In acoustics, there is a massive difference between blocking sound and absorbing it.
Soundproofing (Sound Blocking) is about stopping noise from traveling from one room to another. This requires mass and density. Think of a heavy brick wall versus a sheet of paper. To block your neighbor’s shouting, you need materials that are heavy enough to stop the air vibrations from passing through the wall.
Sound Absorption is about improving the quality of sound inside your room. If your room echoes like a cave, you have a sound absorption problem. Soft, porous materials like foam or fabric “soak up” sound waves so they don’t bounce back at you.
NRC and STC: The Secret Language of Quiet
When shopping for materials, you’ll see two main ratings:
- NRC (Noise Reduction Coefficient): This measures how much sound a material absorbs, on a scale of 0 to 1. An NRC of 0.7 means the material absorbs 70% of the sound that hits it.
- STC (Sound Transmission Class): This measures how well a wall or material blocks sound from passing through it. Higher is better.
As noted in this guide on How to Soundproof a Room or Apartment Affordably and Easily, you also need to distinguish between airborne noise (voices, TV, music) and impact noise (footsteps, doors slamming). Easy room soundproofing usually focuses on airborne noise first, as it’s the easiest to fix with DIY methods.
| Material | Typical NRC Value | Best Use Case |
|---|---|---|
| Acoustic Foam | 0.14 – 1.27 | Reducing echo/reverb |
| Carpet/Rug | 0.40 | Muffling footsteps |
| Ceiling Tiles | 0.50 – 0.60 | Office/Basement echo |
| Acoustic Panels | 0.70+ | Professional recording |
| Mass Loaded Vinyl | N/A (STC 10-36) | Blocking wall noise |
Easy Room Soundproofing by Sealing the Gaps
If we told you that a tiny crack could ruin your entire soundproofing effort, would you believe us? It’s true. A gap as small as 1% in a barrier can leak up to 30% of the sound. If that gap grows to 5%, you’re losing 90% of your sound protection. Sound is like water; it will find the smallest hole and pour through it.
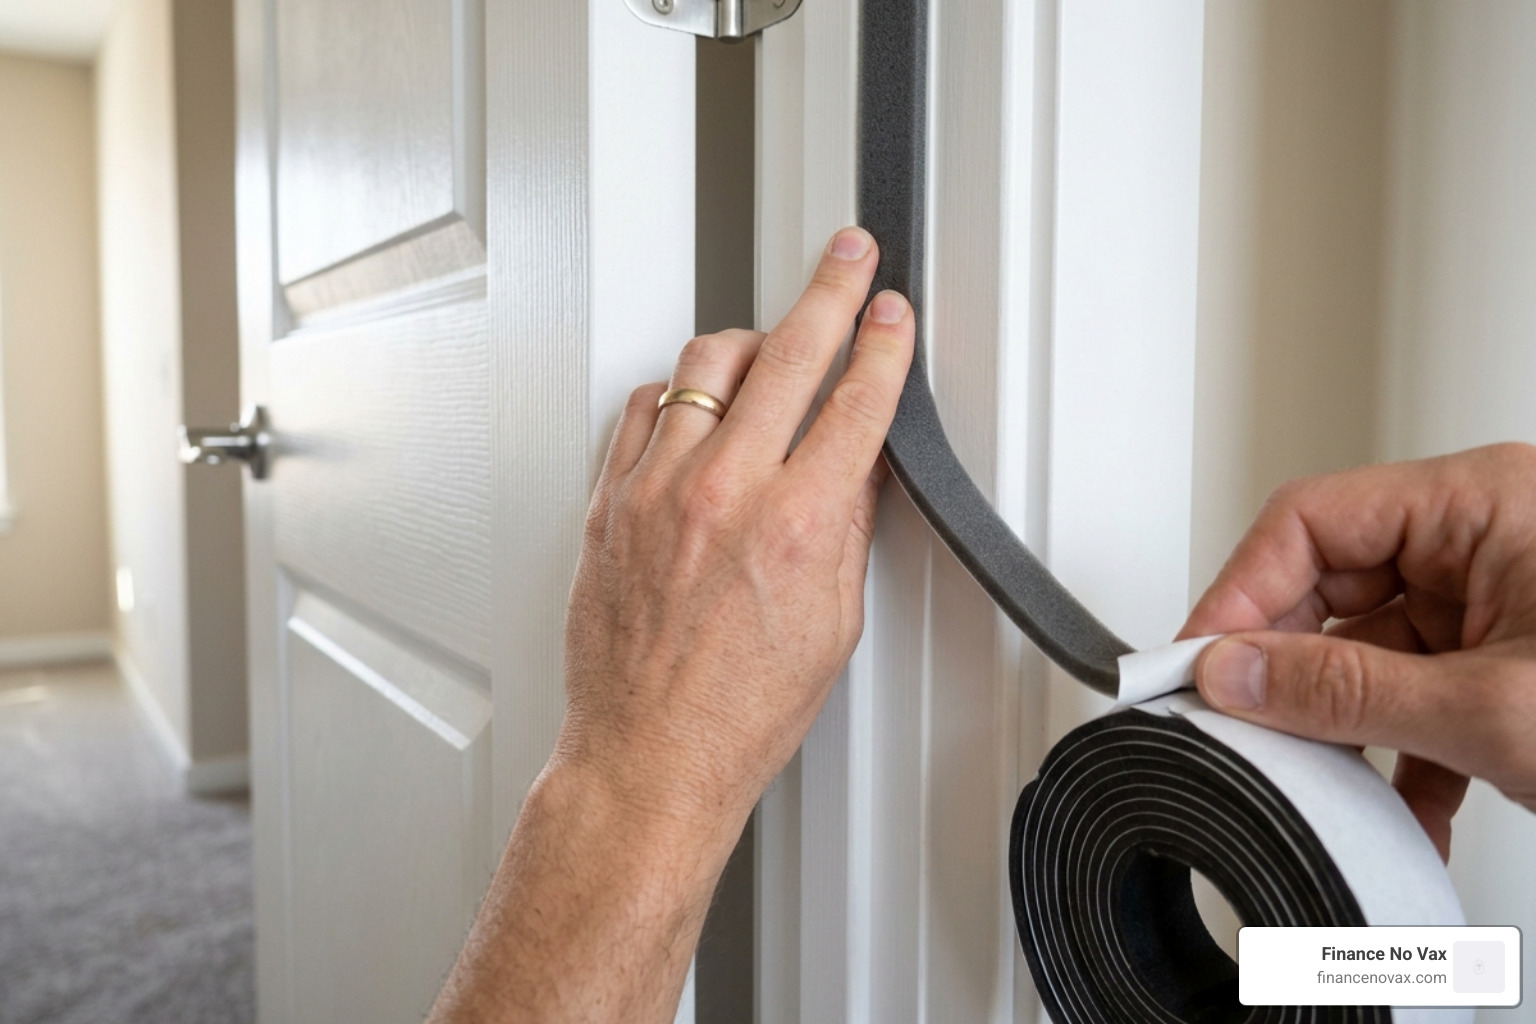
The first step in easy room soundproofing is playing detective. Check your baseboards, window frames, and door seals. If you can see light or feel a draft, sound is getting through.
The Power of Acoustical Caulk
Unlike regular silicone, acoustical caulk stays flexible for years. It won’t crack as your house shifts, meaning the seal stays airtight. Use it around baseboards and window trim to stop “flanking noise” from creeping in from the walls. You can find more budget tips in our guide on Silence on a shoestring: 5 ways to soundproof your walls for less.
Door Sweeps and Draft Stoppers
The biggest gap in most rooms is the one under the door.
- Door Sweeps: These are metal or plastic strips with a rubber fin that screw onto the bottom of your door.
- Draft Stoppers: For a renter-friendly, no-drill option, a weighted fabric “snake” or a slide-on foam stopper works wonders. It blocks both the cold air and the sound of your roommate’s late-night Netflix binge.
Easy Room Soundproofing for Interior Doors
Most interior doors are “hollow-core,” which is basically two thin sheets of wood with cardboard honeycombs inside. They are essentially drums that amplify sound.
If you can’t replace the door with a solid-core door (the gold standard for blocking noise), try these hacks:
- Weatherstripping: Apply adhesive rubber tape around the entire door frame so the door presses against it when closed.
- Mass Loaded Vinyl (MLV): This is a heavy, flexible material that costs about $1 per square foot. Tacking a sheet of MLV to the back of a door can drastically increase its STC rating.
- Door Curtains: Hanging a heavy blackout curtain or a specialized soundproof blanket over the door can act as a secondary barrier.
For more ideas on creating a quiet sanctuary, check out our DIY bedroom soundproofing kits for a silent night.
Renter-Friendly Solutions for Windows and Walls
If you don’t own your home, you can’t exactly tear down the drywall to add rock wool insulation. But don’t worry—we’ve got plenty of non-permanent tricks.

Soundproofing Windows Without Permanent Changes
Windows are often the weakest link because glass is thin and frames often leak air.
- Acoustic Drapes: These aren’t just thick curtains. They are often made of multiple layers and can weigh up to 15 pounds. For maximum effect, use 100% fullness (meaning the curtain is twice as wide as the window) so the deep pleats can trap sound.
- Window Inserts: Companies make custom acrylic panes that “press-fit” into your existing window frame. They create an airtight seal and an insulating air gap that can block up to 70% of outside noise.
- Removable Caulk: If you have drafty windows you don’t plan on opening during the winter, use temporary “zip-off” caulk to seal the seams.
Walls: Adding Mass and Absorption
If your walls are paper-thin, you need to add “mass” to stop them from vibrating.
- Bookshelves: A wall-to-wall bookshelf filled with dense books is one of the best “accidental” soundproofing tools. Just make sure the shelf isn’t touching the wall directly if possible—a tiny air gap can help.
- Soundproof Blankets: These are denser than moving blankets and often come with grommets for easy hanging. They are perfect for home offices.
- The ultimate guide to budget-friendly soundproofing panels and foam (https://financenovax.com/the-ultimate-guide-to-budget-friendly-soundproofing-panels-and-foam/) offers a deep dive into which materials give you the most bang for your buck.
According to How to Soundproof a Room, even simple changes like hanging a large, thick tapestry or a rug on the wall can help reduce the “flutter echo” in a room.
DIY Acoustic Panels and Strategic Furniture Placement
If you’re a bit handy, you can build your own professional-grade acoustic panels for a fraction of the retail price. Commercial panels can cost $50-$100 each, but you can build them for about $15-$20.
How to Build a DIY Panel
- The Frame: Use 1×2 or 1×3 furring strips to build a simple wooden rectangle.
- The Core: Fill the frame with rock wool (mineral wool) or high-density fiberglass. These materials have much higher NRC values than egg-crate foam.
- The Fabric: Wrap the frame in a breathable fabric. If you can blow air through the fabric easily, sound waves can pass through it into the insulation.
- The Finish: Staple the fabric tightly to the back of the frame.
For a detailed walkthrough, see our DIY soundproof panels for walls: a step-by-step guide.
Where to Place Your Panels
You don’t need to cover every inch of your walls. Instead, target first reflection points.
- The Mirror Trick: Sit at your desk and have a friend slide a mirror along the wall. Wherever you see your speakers (or your own face) in the mirror, that’s a reflection point. Hang a panel there.
- Corners: Low-frequency sounds (bass) tend to build up in corners. Placing “bass traps” or thicker panels in corners can stop that annoying “boomy” sound.
Strategic Furniture Layout
Your room’s layout can actually help with easy room soundproofing.
- The “Mass” Wall: Place your heaviest furniture (wardrobes, dressers, full bookshelves) against the wall you share with a noisy neighbor.
- Decoupling: If your PC tower or speakers are on your desk, they vibrate the desk, which vibrates the floor. Place them on small foam pads to “decouple” them from the furniture.
- Soft Surfaces: Replace a glass coffee table with an upholstered ottoman. Add plush pillows and throws to your chairs. Every soft surface helps “soak up” the noise.
Frequently Asked Questions about Easy Room Soundproofing
How many acoustic panels do I need for my room size?
It depends on the room’s purpose. For a standard home office, covering 15-20% of the wall surface area is usually enough to kill the echo. If you’re recording a podcast or music, you might want to go up to 30-40%. For a 10×10 room, starting with four to six 2’x4′ panels is a great baseline.
What are the most common mistakes to avoid when soundproofing?
The biggest mistake is using egg-crate foam and expecting it to block noise from neighbors. Foam is for absorption (echo), not blocking (transmission). Another mistake is ignoring the “1% gap” rule. You can spend thousands on panels, but if there’s a gap under your door, you’ll still hear everything in the hallway.
How can I test if my soundproofing is actually working?
The easiest way is the Clap Test. Stand in the middle of the room and clap loudly. If you hear a ringing or “zing” sound afterward, you still have too many hard surfaces. For blocking noise, use a decibel meter app on your phone. Play loud music in the “noisy” room and measure the sound levels in your “quiet” room before and after your treatments.
Conclusion
Achieving a quiet home doesn’t require a miracle—it just requires a bit of strategy. By focusing on easy room soundproofing techniques like sealing air leaks, adding mass to doors, and strategically placing DIY panels, we can transform a chaotic space into a focused sanctuary.
Soundproofing is often an iterative process. Start with the “big wins”—the gaps under the doors and the thin windows. Once those are sealed, move on to adding rugs and wall treatments. You’ll be amazed at how much a few simple changes can improve your quality of life.
If you’re ready to dive deeper into more home improvement projects, explore our Category/Diy Solutions/ for more expert guides. For all your financial and home optimization needs, visit us at Finance No Vax. Happy quiet-making!
