
Quiet Your Knitting Nook Without Dropping a Stitch
Why Your Knitting Nook Deserves a Quieter Space
Budget soundproofing a knitting corner is easier than you think — and you can do it for under $100 using materials you may already own.
Quick answers for a quieter knitting corner:
- Hang heavy blankets or thick curtains on walls behind and beside your chair
- Layer a thick rug on the floor to absorb sound bouncing upward
- Stack bookshelves with yarn and books along shared walls
- Build simple DIY acoustic panels using furring strips and recycled cotton batting
- Use a clothing rack draped with moving blankets to create a cozy, sound-dampened nook without touching a single wall
You finally carved out a little corner for yourself. A chair, a basket of yarn, maybe a lamp. It should feel peaceful.
But then the noise creeps in — a TV from the next room, street traffic, a dog barking, or the echo of your own space making everything feel louder than it should.
Noise is one of the biggest focus-killers for anyone working or crafting at home. And if you’re a remote worker who also knits to decompress, a loud or echoey corner can chip away at both your productivity and your calm.
The good news? You don’t need to gut your walls or spend hundreds of dollars to fix it. Most of the solutions are simple, reversible, and genuinely budget-friendly — perfect whether you rent or own.
This guide walks you through everything: the right materials, how to place them, and how to build your own panels from scratch if you want to go further.
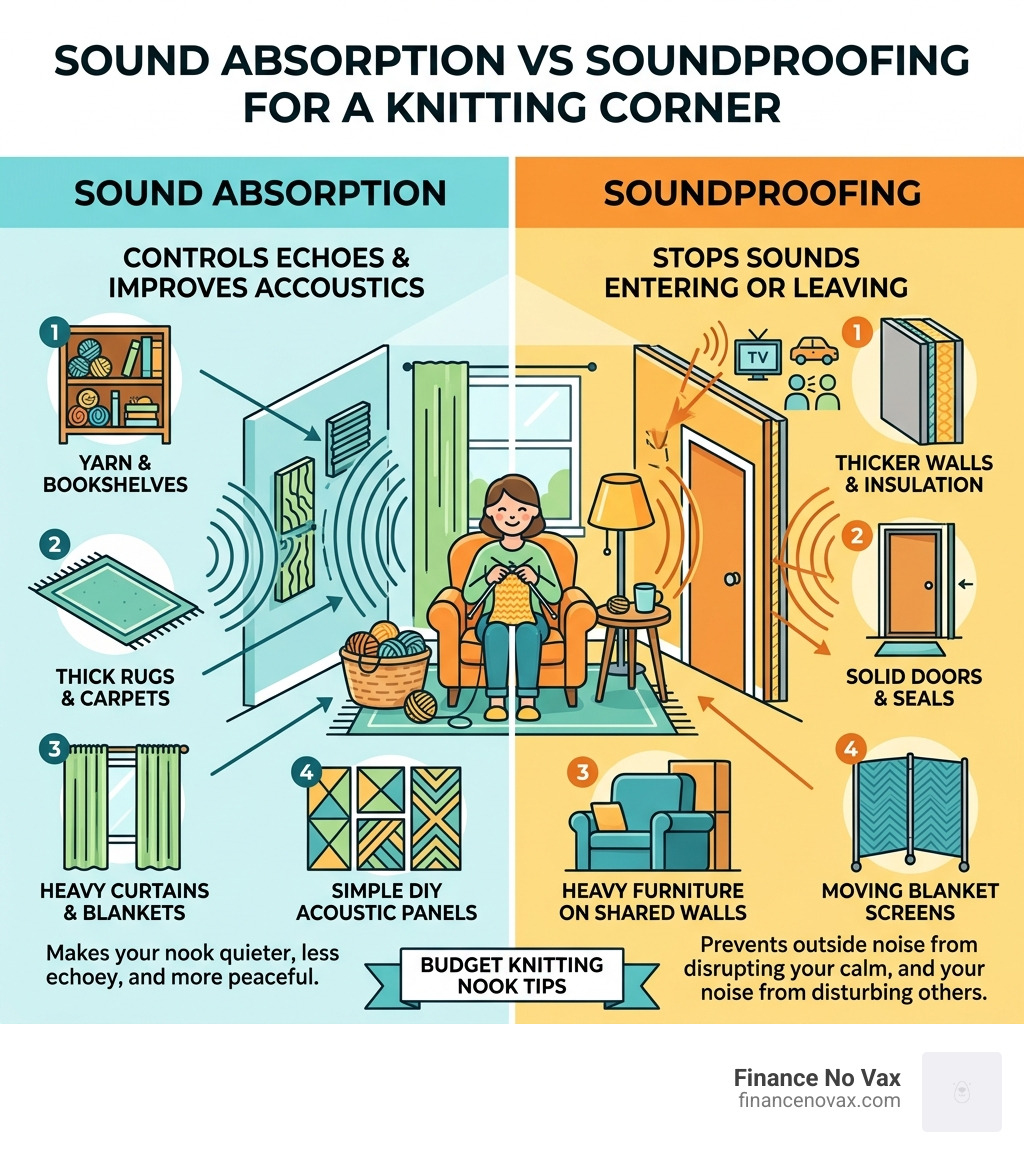
Budget soundproofing knitting corner terms to know:
Sound Absorption vs. Soundproofing for Your Budget Soundproofing Knitting Corner
Before we start grabbing blankets, we need to clear up a common misunderstanding. In acoustics, there is a big difference between soundproofing and sound absorption.
Soundproofing is about blocking sound from moving between rooms. This usually requires adding serious mass to walls, like double layers of drywall or heavyweight POE noise barriers. For most of us, true soundproofing is expensive and involves construction.
Sound absorption, on the other hand, is about controlling the sound inside your room. It stops noise from bouncing off hard surfaces like drywall, which has a dismal Noise Reduction Coefficient (NRC) of about 0.15. By adding soft, porous materials, you can soak up those reflections, making the room feel quieter and more intimate.
For a budget soundproofing knitting corner, we are primarily focusing on absorption and vibration reduction. We want to stop the “ping-pong” effect of sound waves hitting your walls. As noted in this guide to DIY acoustic walls, these treatments don’t necessarily block your neighbor’s leaf blower, but they will make your immediate environment feel significantly more peaceful.
Why Your Budget Soundproofing Knitting Corner Needs Treatment
You might think, “I’m just knitting, how much noise could I possibly make?” But think about the environment:
- Needle Clicks: The rhythmic “clack-clack” of metal or plastic needles can become surprisingly loud in a room with bare walls.
- Machine Vibrations: If you use a knitting machine or a yarn winder, the vibrations can travel through tables and into the floor.
- Internal Echoes: Hard surfaces make every little sound — a podcast, a ticking clock, or a conversation — feel sharper.
Using budget fabric panels helps dampen these sounds, providing the mental clarity needed for complex lace patterns or simply to decompress after a long day. A well-treated corner reduces the “flutter echo” that happens when sound waves bounce rapidly between parallel walls.
Top Inexpensive Materials for a Quiet Craft Space
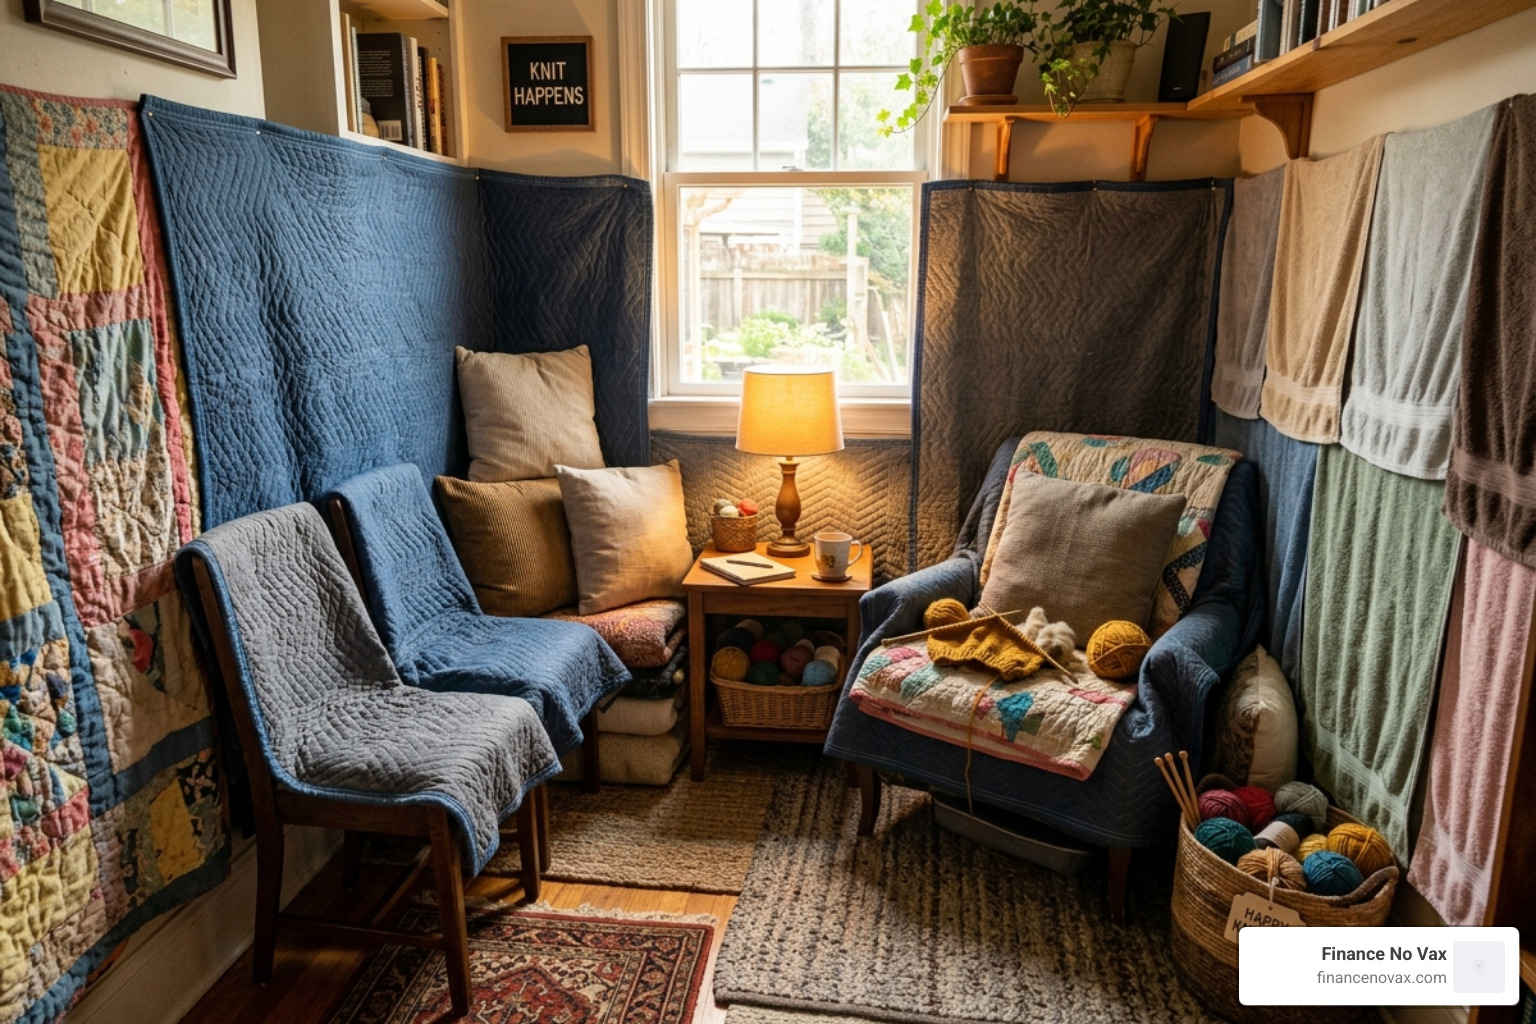
You don’t need to buy professional studio gear to see results. In April 2026, the trend in home crafting is “functional cozy” — using what you have to create a sanctuary.
Here are the most effective, low-cost materials:
- Moving Blankets: These are the unsung heroes of DIY acoustics. They are dense, heavy, and incredibly cheap.
- Thick Rugs: A plush rug or carpet can have an NRC of up to 0.4. It’s the first line of defense against sound bouncing off a hardwood floor.
- Velvet Curtains: Velvet is naturally excellent at absorbing sound. You can even upholster velvet panels to hang as art.
- Foam Toppers: High-density foam mattress toppers can be cut up and used as internal insulation for DIY panels.
NRC Comparison Table
| Material | NRC Rating (Approx.) | Best Use |
|---|---|---|
| Bare Drywall | 0.15 | None (Reflects sound) |
| Thick Carpet | 0.40 | Floors |
| Cheap Foam Panels | 0.30 – 0.60 | Walls (Mid-range) |
| Professional Panels | 0.95 – 1.0 | Walls (High-end) |
| DIY Cotton Panels | 0.85 – 0.95 | Walls (Budget Best) |
Repurposing Household Items for a Budget Soundproofing Knitting Corner
Look around your home. You likely have “acoustic treatment” sitting in other rooms.
- Bookshelves: A bookshelf filled with yarn and books is a fantastic natural diffuser. It breaks up flat wall surfaces so sound waves can’t bounce back cleanly.
- Heavy Drapes: Floor-to-ceiling curtains can act as a secondary wall, trapping sound between the fabric and the window.
- Carpet Remnants: Check local flooring stores for remnants. You can often get these for a few dollars to place under your chair or knitting machine.
- Non-Toxic Cotton: Old cotton towels or denim scraps can be layered inside frames. This is a much safer, non-toxic alternative to fiberglass for a bedroom setting.
Step-by-Step: Building DIY Acoustic Panels for Under $100
If you want professional-level results for a fraction of the cost, building your own panels is the way to go. DIY panels can save you about 25% compared to pre-made versions.
1. Gather Your Materials
- Frames: Use “furring strips” from the hardware store. They are cheap, lightweight wood.
- Insulation: Rockwool (mineral wool) or recycled cotton batts. Rockwool is excellent for mid-to-high frequencies.
- Fabric: Anything breathable. If you can blow air through it, sound can get through it to the insulation. Burlap, linen, or even old bedsheets work.
- Hardware: L-brackets for the corners, wood glue, and a staple gun.
2. Build the Frame
Cut your furring strips into a rectangle (standard size is 24″ x 48″). Use wood glue and L-brackets on the inside of the joints to keep them square. As mentioned in this vocal booth guide, a sturdy frame is essential for long-term durability.
3. Insert the Insulation
Lay your insulation inside the frame. If you are using Rockwool, wear gloves and a mask! If you prefer a safer route, recycled cotton is much easier to handle in a bedroom.
4. Wrap and Staple
Lay your fabric face down, place the frame on top, and pull the fabric taut. Start stapling from the center of each side and work your way to the corners, folding them neatly like a gift wrap. This is the secret to making DIY soundproof panels for walls look high-end rather than “homemade.”
Strategic Placement and Mounting Without Wall Damage
Where you put the panels matters more than how many you have.
- First Reflection Points: Sit in your knitting chair. The spots on the walls directly to your left and right are your first reflection points. This is where panels should go first.
- Ear Height: Ensure the center of the panel is roughly at ear level when you are seated.
- The Air Gap Trick: Hang your panels 2 inches away from the wall. This traps sound behind the panel as well, effectively doubling the absorption for free!
For renters, you can use chic and affordable mounting hacks. Heavy-duty Command strips work for lighter panels, or you can use picture wire and a single sturdy nail. If you want to avoid walls entirely, mount your panels to a rolling clothing rack to create a mobile “privacy shield.”
Testing and Maintaining Your Sound-Treated Nook

How do you know if your budget soundproofing knitting corner is actually working? You don’t need fancy microphones. Use the Clap Test.
Stand in your corner and clap loudly. Do you hear a sharp “zing” or a ringing echo? That’s flutter echo. After you install your panels, try it again. The sound should be “dead” — a short, dull thud with no ringing. That’s the sound of a peaceful workspace.
Maintenance Tips for 2026
- Dusting: Acoustic fabric can trap dust. Give them a quick pass with a vacuum brush attachment once a month.
- Humidity Control: If you use mineral wool, ensure your nook isn’t damp, as insulation can hold moisture.
- Reversibility: Keep your original scraps. If you move, these DIY soundproofing ideas are easy to take with you and reconfigure in a new space.
Frequently Asked Questions about Knitting Corner Soundproofing
How many panels do I need for a small corner?
You don’t need to cover every inch of the wall. Generally, treating 30-40% of the wall surface area is enough to kill the most annoying echoes. In a small corner, two panels (one on each meeting wall) are often plenty to create a “quiet zone.”
Is egg carton foam effective for soundproofing?
This is a classic acoustic myth. Egg cartons are too thin to absorb significant sound and are a major fire hazard. You are much better off using a single thick moving blanket or a DIY cotton panel.
What is the safest non-toxic insulation for a bedroom?
Recycled cotton (often made from old blue jeans) is the gold standard for non-toxic DIY. It doesn’t off-gas, it won’t irritate your skin, and it has an NRC rating nearly identical to professional mineral wool.
Conclusion
Creating a budget soundproofing knitting corner doesn’t require a professional contractor or a massive bank account. By focusing on absorption over blocking, and utilizing clever DIY techniques like furring strip frames and repurposed blankets, you can build a sanctuary for under $100.
At Finance No Vax, we believe your creative peace shouldn’t be a luxury. Whether you are stitching a complex sweater or just hiding from the noise of a busy household, these small changes will help you hear your thoughts again.
Ready to find more ways to save on your home projects? Check out more DIY soundproofing solutions or start your quiet project today to see how a little silence can make a big difference in your craft.
