Botanical Sketching for Beginners: How to Draw From a Real Flower
Set up one real flower, look before you draw, measure with your pencil and fill a study page with small views: side, front, bud, petal and leaf.
A real flower on the table teaches things imagination cannot: how a petal actually bends, where a leaf really joins the stem, how the whole plant leans toward the light. That close looking is the heart of botanical sketching, and it needs nothing more than one flower, a pencil and some patience.
The goal is not a finished picture for the wall. It is a page of small, honest studies that record what you saw. This guide covers how to set the flower up, what to look for before the pencil moves, and how to fill a study page one view at a time.
Set up the flower so it stays put
Stand a single stem in a small jar of water. One flower is enough; a full bunch gives you too much to sort out at once. Raise the jar on a stack of books until the bloom sits at eye level, about an arm’s length away. Looking down on a flower squashes its shape and hides the way the head joins the stem.
Place it so light comes from one side, such as next to a window or a desk lamp. Side light gives every petal a light face and a shadow face, which makes the form much easier to read.
Turn the jar slowly, choose the view you like, then leave it alone. If the jar moves halfway through, your measurements stop matching.
Look before you draw
Spend two or three minutes only looking. It feels slow, but it saves a lot of erasing. Ask yourself a short list of questions:
- How many petals are there? Count them. Notice whether they sit in one ring or in layers.
- What is the construction shape? Squint until the detail blurs. The bloom will read as a disc, a cup, a cone, a bell or a ball.
- Where is the center? Find the point every petal seems to grow from, even if it is hidden.
- How do the leaves join the stem? Check whether they sit in pairs or alternate, and whether each has its own short stalk.
- Which way does the stem lean? Almost no stem is straight. Follow its curve from the jar to the bloom.
The answers become your plan for this particular flower, bent petal and crooked stem included.
Measure with your pencil
Your pencil is also a measuring stick. Hold it at arm’s length with your elbow locked, close one eye, and line the tip up with one edge of the bloom. Slide your thumb along the pencil until it marks the other edge. That length is one flower-width.
Keeping your arm straight, turn the pencil and compare that width with other parts: the height of the bloom, the length of the stem down to the first leaf, the length of a leaf. You are collecting comparisons, such as “the stem is about three flower-widths long,” not inches.
Mark these comparisons on the page as light ticks with an HB pencil before you draw anything else. The guide to measuring flower proportions explains this sighting method in more detail, including how to keep petals evenly spaced.
Plan a study page, not one picture
A study page holds several small views of the same plant. This takes the pressure off any single drawing, and each view explains something the others cannot. A simple, useful layout looks like this:
- Main side view. Draw the whole flower with its stem and one leaf in the middle of the page, about two thirds of the page height.
- Front view. Turn the jar so the bloom faces you and draw it small in an upper corner, about a third the size of the main view.
- A bud. If the plant has one, give it a corner of its own. Buds are simple shapes and show how the petals start out.
- A single petal. Draw one petal on its own, with its center line and the curve of its tip.
- A single leaf. Record the outline, the midrib and the edge, whether smooth or toothed.
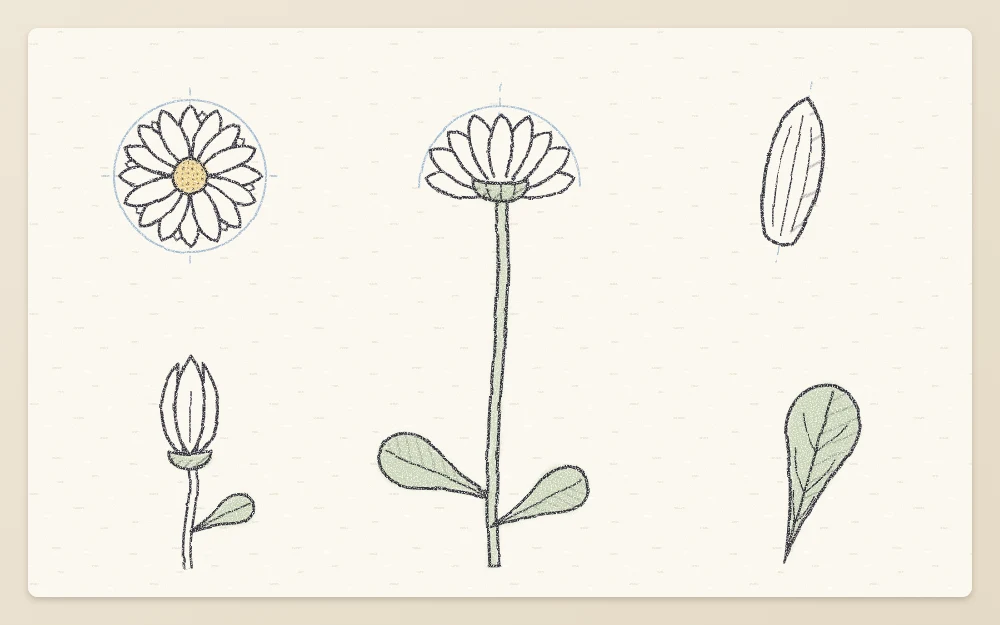
Leave breathing room between the studies so the page does not feel crowded. If you want more help arranging them, the article on composing a sketchbook page covers focal points and empty space.
Draw each view from light shapes to firm lines
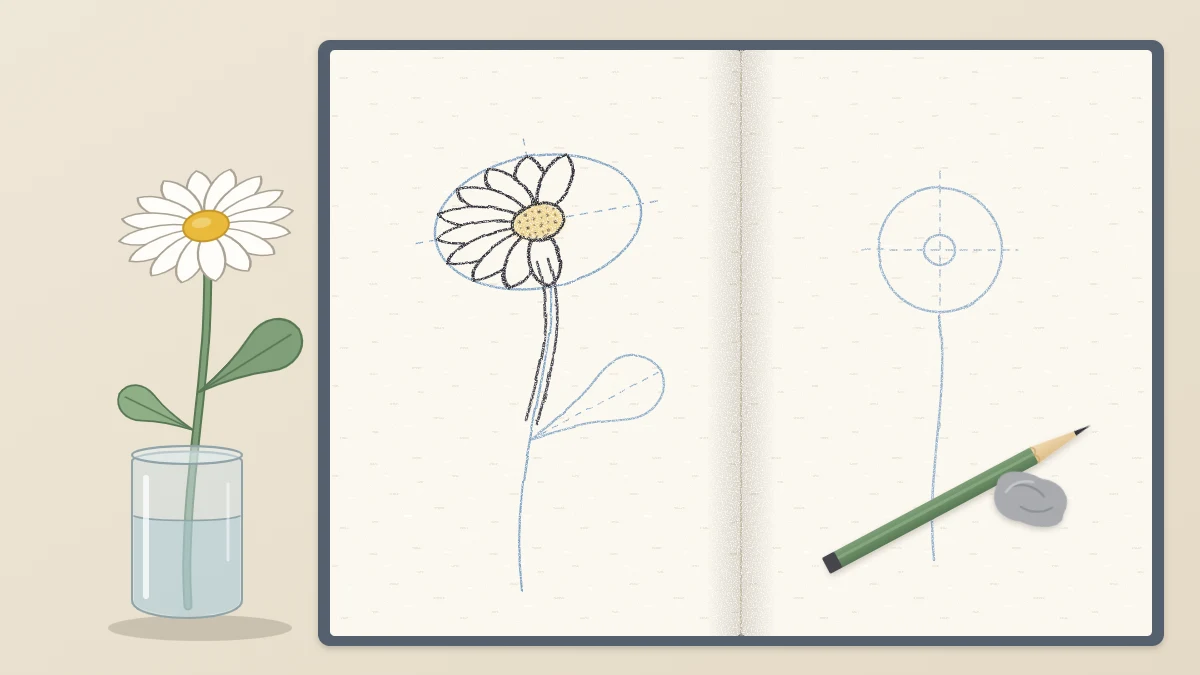
Start every study the same way. With an HB pencil and very little pressure, draw the construction shape you found while looking, then a center line for the stem. Add the petals as simple shapes inside that guide, checking each against the real flower rather than against your memory of flowers.
Only when the placement looks right, switch to a 2B pencil and firm up the contour. Draw the nearest petals completely and tuck the others behind them.
The middle of the bloom deserves the same attention as the petals. A disc of tiny dots, a ring of stamens and a seed pod all need different marks, and the guide to drawing flower centers shows how to handle each kind.
Tip
Write short notes beside the studies: the date, the petal count, the colors, anything a pencil cannot show. Notes are a traditional part of a study page and they make it far more useful later.
Working from photos and sketching outdoors
A live flower is the better teacher because you can turn it and look around its edges. When that is not possible, work from photos you took yourself. Take several: the whole plant, the bloom from the front and the side, and a close view of a leaf joining the stem. Together they replace the turning jar.
Outdoors, sketch wildflowers where they grow instead of picking them. Sit so the bloom is near eye level, work small, and record the main shape before the detail. The tutorial on drawing wildflowers in a simple meadow sketch is a good next step once you have a few outdoor studies.
Common problems and simple fixes
- The flower droops or opens while you draw. Finish the main view first, in about 20 minutes, and treat changes as material for another small study.
- The drawing looks generic. You probably drew from memory. Look at the flower more often than at the paper.
- The bloom is too big for the stem. Measure again with the pencil and correct the light ticks before adding detail.
- The page fills with detail too early. Place all the construction shapes for a view before finishing any one petal.
Your first study pages will likely look uneven, and that is normal. Results vary with practice, but each page usually makes the next flower a little easier to see.
Frequently asked questions
What flower is best for a first botanical sketch?
Choose a flower with a clear, simple shape and only a few large parts, such as a daisy or a tulip. A single stem with one open bloom and a leaf or two is easier to study than a dense, many-layered flower, because you can see how every part connects.
How long does a botanical study page take?
A first page with one main view and three or four small studies takes roughly 45 minutes to an hour, though it varies a lot from person to person. Cut flowers change as they sit, so it helps to draw the main view first and add the small studies afterward.
Is it okay to draw from a photo instead of a live flower?
Yes, as long as the photos are ones you took yourself. Take several from different sides so you understand the whole form, including a close view of where a leaf meets the stem. A live flower still teaches more, because you can turn it and look behind the petals.