Flower Drawing Composition: How to Arrange a Sketchbook Page
Turn scattered flower sketches into a balanced page: pick a focal flower, place it off-center, use odd numbers, overlap shapes, keep empty space and test layouts with thumbnails.
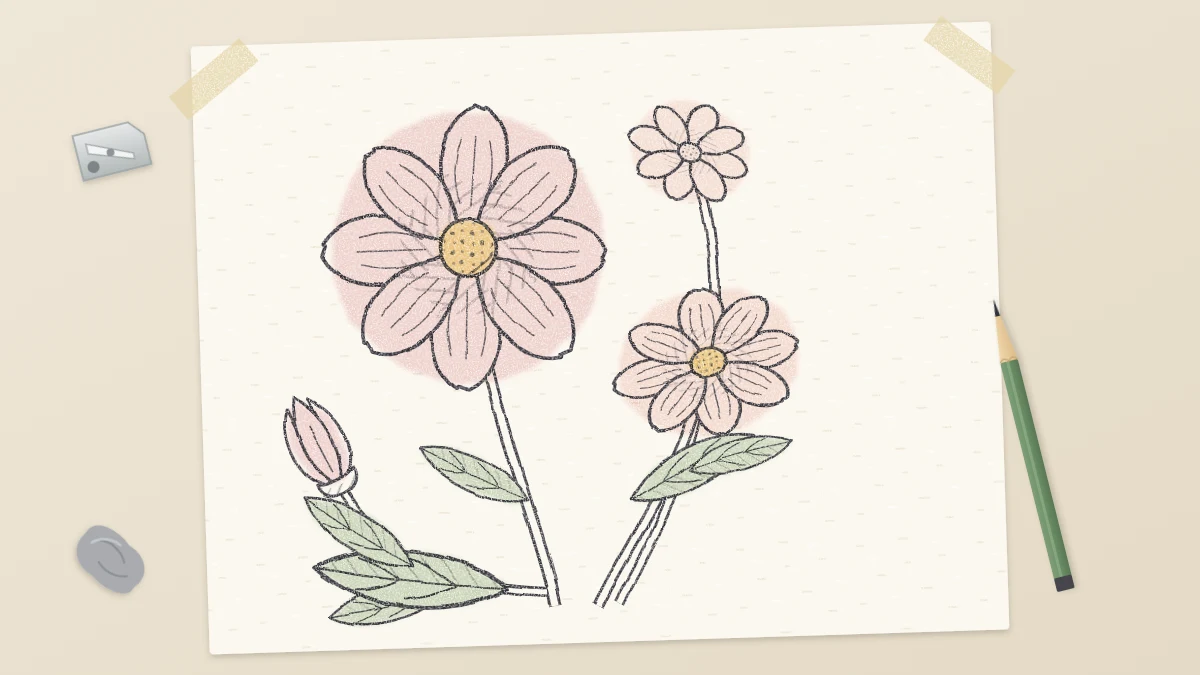
You can draw a convincing daisy, a decent tulip and a tidy leaf, and still end up with a page that feels scattered. The flowers are fine. What is missing is a plan for how they sit together on the paper.
Flower drawing composition is simply the set of choices about size, position and empty space that makes a page read as one picture rather than a pile of separate sketches. The choices are few, and you can make most of them in two minutes before the real drawing starts.
Choose one focal flower
Every page needs one flower that the eye goes to first. Decide which it is before you draw anything, and give it three advantages: make it the largest, give it the most detail, and give it the darkest darks. Everything else on the page supports it.
A useful size rule is to make the focal flower about one and a half to two times the width of the next largest bloom. Two flowers of the same size and finish compete with each other.
Place the focal point off-center with thirds
A flower placed in the exact middle of the page tends to look stiff, like a target. To find a livelier spot, lightly divide the page into thirds with an HB pencil: two faint vertical lines and two faint horizontal lines, making nine equal boxes.
The four points where those lines cross are the strongest places for a focal flower. Put the center of your main bloom on or near one of them. Then decide which way that flower faces, and leave more empty space on that side so it has room to “look” into the page.
Use odd numbers and vary everything else
Groups of three or five flowers usually look more natural than groups of two or four. Even numbers pair off into neat rows, while odd numbers form loose triangles that keep the eye moving.
Once you have your group, make each member different from the others in at least one way:
- Size. One large, one medium, one small reads better than three medium flowers.
- Angle. Show one bloom from the front, one tilted so its circle becomes an ellipse, and one from the side.
- Stage. Mix an open flower with a half-open one and a bud.
- Spacing. Set two flowers close together and the third farther away. Equal gaps look mechanical.
Overlap shapes and let stems lead the eye
Flowers lined up side by side with a neat gap between each look like a row of stickers. Let some of them overlap instead. Draw the front flower completely and tuck the next one behind it so that a quarter to a third of it is hidden. That one overlap tells the viewer which bloom is closer and ties the two into a single shape.
Stems work as arrows. The eye follows a stem to whatever is at its end, so aim your stems on purpose. Curve them gently toward the focal flower, and avoid a stem that runs straight off a corner of the page, which carries attention out of the drawing. If you are gathering several stems into one bunch, the tutorial on drawing a simple flower bouquet shows how to pass them all through one tie point.
Common mistake
Letting two shapes just touch. A petal tip that barely kisses a leaf or the page edge creates a distracting spot. Either overlap the shapes clearly or leave a clear gap between them.
Leave quiet empty space
Blank paper is part of the composition. It gives the flowers room and tells the viewer where not to look. As a rough guide, keep at least a third of the page empty, and keep that empty area in one or two large pieces instead of many small gaps.
Leave a margin as well. Stop the outermost petals and leaves about half an inch (1.5 cm) inside the page edge, unless you choose to run a stem off the bottom on purpose.
Plan with thumbnail sketches
A thumbnail is a tiny planning sketch, drawn in under a minute, that tests a layout before you commit to it. Three or four of them will usually show you which arrangement works.
- With an HB pencil, draw four small rectangles in the same proportions as your page, each about 2 in (5 cm) wide.
- In each one, stand in for the flowers with plain circles and ovals, and draw the stems as single curved lines. No petals, no detail.
- Make each thumbnail different: move the largest circle to another third, change the stem direction, shift the empty space.
- Squint at all four. Pick the one where your eye lands on the large circle first and then travels easily to the others.
- Copy that arrangement onto your full page as light construction shapes, keeping the same positions and relative sizes.
Four common layouts to try
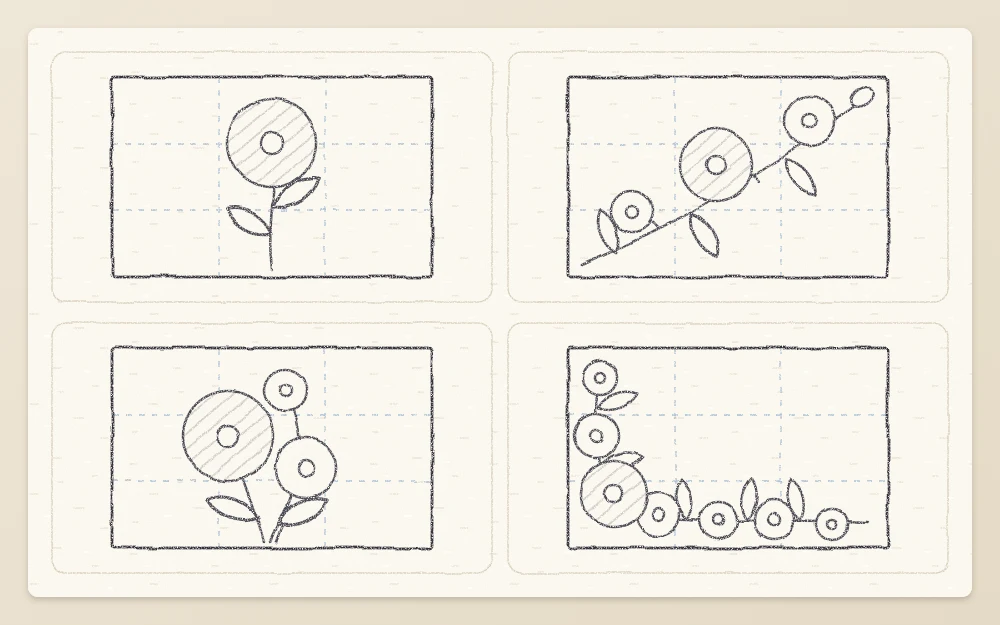
Most flower pages are a version of one of four arrangements. Each suits a different kind of subject.
| Layout | How it is arranged | Best for |
|---|---|---|
| Single specimen | One plant, upright, with its stem and leaves and wide margins around it | Careful studies of one flower |
| Diagonal spray | Stems sweep from one lower corner toward the opposite upper corner | Branches, long stems and pages that need movement |
| Cluster | Three or five overlapping blooms of different sizes grouped off-center | Mixed flowers, buds and bouquets |
| Border | Flowers and leaves run along two edges that meet at a corner, leaving the middle open | Pages with notes or lettering in the center |
The single specimen is the one layout where a centered subject works well, because the plant’s own curve and its leaves break the symmetry. It is the natural choice when you are sketching from a real flower and want the page to record one plant clearly.
The cluster and the diagonal spray both rely on overlap and varied heights. For a looser, more natural version of those ideas, with stems leaning in different directions, try the simple wildflower meadow sketch.
Check the page before adding detail
With the construction shapes in place and nothing else, hold the page at arm’s length or turn it upside down. Both tricks make you see shapes instead of flowers. Ask three questions: Is there one clear focal flower? Is the empty space in large, calm pieces? Do the stems lead in, not out?
Fixing a circle at this stage takes a few seconds with a kneaded eraser. Fixing a fully shaded bloom means starting over.
Frequently asked questions
How many flowers should go on one sketchbook page?
Three or five is a comfortable number for most pages, because odd groups form loose triangles instead of pairing off. A single flower with its stem and leaves also works well. Beyond five, treat the extra blooms as small supporting shapes with very little detail so the page does not become crowded.
Should the main flower be in the middle of the page?
Usually not. A bloom in the exact middle tends to look static. Dividing the page into thirds and placing the flower near one of the four crossing points gives a livelier result. The exception is a single upright specimen, where the stem and leaves break up the symmetry on their own.
What is a thumbnail sketch?
A thumbnail is a very small planning sketch, roughly the width of two fingers, drawn in under a minute. Flowers are reduced to circles and stems to single lines. Drawing three or four lets you compare layouts and choose the strongest one before spending time on a full-size drawing.