Flower Drawing Mistakes: 10 Beginner Problems and How to Fix Them
Ten common reasons flower drawings look stiff, flat or lopsided, each with its cause and a small habit change that fixes it.
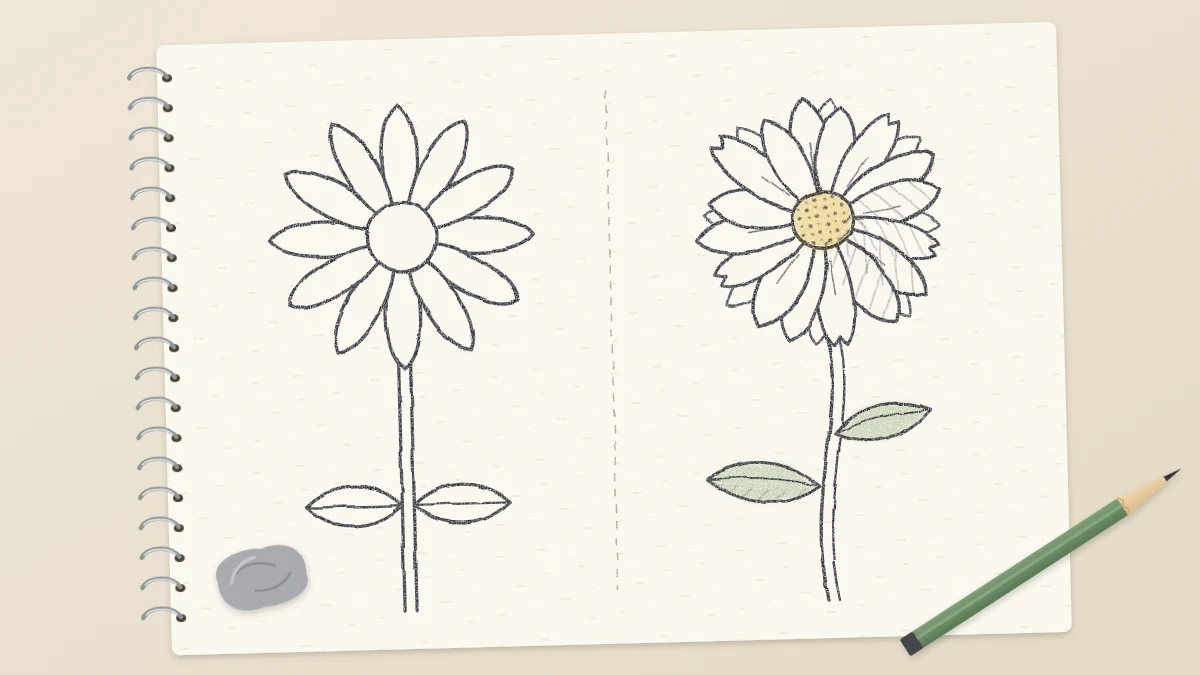
When a flower drawing looks stiff, flat or lopsided, the cause is rarely a lack of ability. It is usually one of a small number of habits, and each has a simple fix. The flower drawing mistakes below are the ones that show up most often in early sketchbooks.
Read through the list with one of your own drawings beside you. Most people recognize two or three problems straight away. Pick one to work on in your next session rather than trying to correct all ten at once.
Mistakes in the first few lines
1. Pressing hard from the first line
Why it happens: a dark line feels decisive, and a nervous hand grips tightly.
The fix: begin every drawing with an HB pencil held a little farther back from the tip than you would for writing. Your first lines should be faint enough that a kneaded eraser lifts them with one press. Save firm pressure and the 2B pencil for the last stage, when you already know where each line belongs.
2. Skipping the construction shape
Why it happens: petals are the interesting part, so it is tempting to start with them.
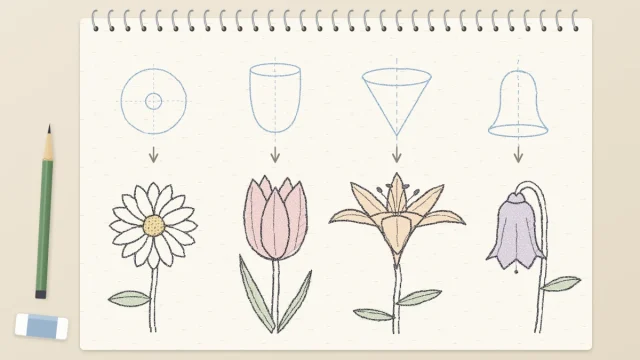
The fix: spend the first half minute on a light circle, cup or cone that marks the full size of the flower, plus a dot for the center. Petals drawn inside a guide stay the same length all the way around. If you are unsure which guide a flower needs, the overview of circles, cups, cones and other construction shapes sorts them out.
3. Drawing too small
Why it happens: a small drawing feels safer and uses less of the page.
The fix: make the flower head at least 3 in (8 cm) across. At that size your whole arm can move, petals have room for a center line and a curve, and overlaps are large enough to draw clearly.
Mistakes in the petals and center
4. Making every petal identical
Why it happens: once one petal looks right, the hand repeats it like a stamp.
The fix: keep the length consistent but change something small on each petal: a slightly wider middle, a tip that leans, an edge tucked behind its neighbor. Let two or three petals overlap.
5. Drawing every flower flat from the front
Why it happens: the front view is the one we carry in our heads, and it is the easiest to build.
The fix: tilt the flower. Swap the guide circle for an ellipse, move the center slightly toward the back edge, and shorten the petals at the front and back while leaving the side petals long. That shortening is foreshortening, and even a mild tilt makes a flower look as if it occupies space instead of lying pressed on the page.
6. A center that is off or too small
Why it happens: the center is added last, wherever there is room left.
The fix: place the center before any petal, and compare its width with the length of a petal on the real flower. On many daisy-like flowers the center is wider than beginners expect. If your petals come out longer on one side than the other, the center has drifted. The guide to measuring flower proportions covers how to check this with your pencil.
Mistakes in line and shading
7. One heavy outline everywhere
Why it happens: going over every edge with the same firm pressure feels like finishing.
The fix: vary the line weight. Use a thicker, darker line on the shadow side and where one petal tucks under another, and a thinner or even broken line on edges that face the light. The contrast alone suggests form before any shading is added. There is a full walk-through in the article on clean contours and line weight.
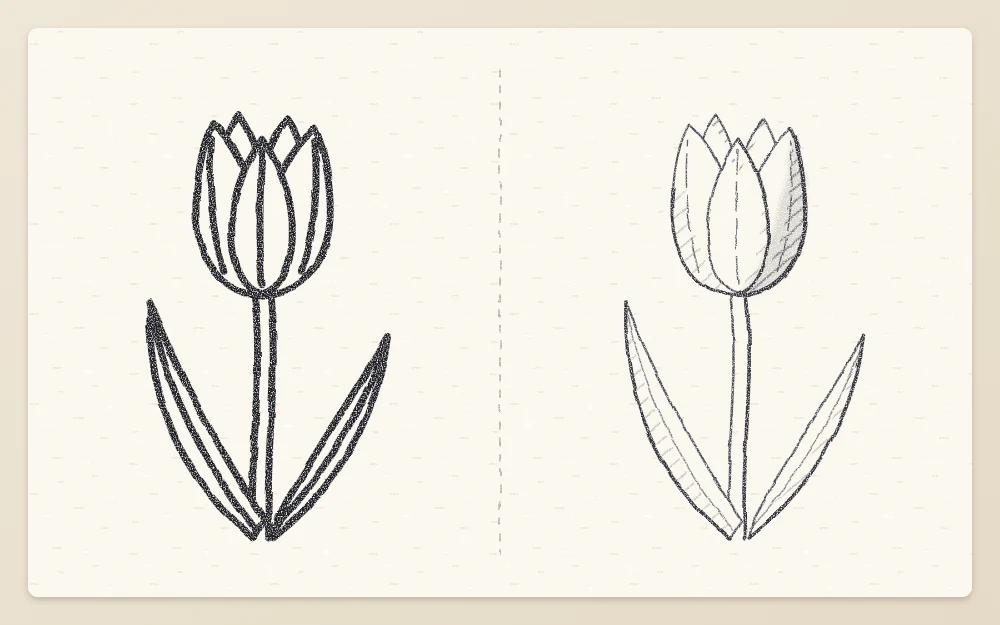
8. Smudged shading
Why it happens: the side of the drawing hand drags across soft graphite, or a fingertip is used to blend.
The fix: rest your hand on a clean scrap sheet, and work across the page away from your drawing hand so that it does not pass over finished areas. Build tone with layers of light hatching rather than rubbing. For a method that keeps petals clean, see the guide to shading flowers in pencil.
Tip
If an area has already gone gray and muddy, press a kneaded eraser flat onto it and lift straight up, several times, turning the eraser to a clean face. This lightens the tone without scrubbing the paper.
Mistakes in stems and leaves
9. Ruler-straight stems
Why it happens: a stem seems like a simple line, so it is drawn as a straight one, often from the wrist in short pieces.
The fix: draw the stem as one long, gentle curve in a single stroke, moving from the shoulder. Start at the base of the flower head and let the line bend slightly under the weight of the bloom. Then add a second line beside it, almost parallel, a touch wider apart toward the bottom. Never use a ruler for a stem.
10. Leaves stuck on with no attachment point
Why it happens: leaves are added at the end to fill empty space, so they float beside the stem or sprout from its edge at random.
The fix: decide where each leaf joins before drawing it. Mark a small joint on the stem, then begin the midrib of the leaf from that joint and let it curve outward. A leaf that grows from a clear point looks attached. On some flowers, such as a tulip, the leaf base wraps around the stem instead, so look at the real plant to see how it connects.
A quick check before you call a drawing finished
Hold the page at arm’s length, or prop it up and step back. Distance hides the detail and shows the big problems. Then ask:
- Is the flower large enough to read clearly?
- Are the petals even in length around the center, but varied in shape?
- Does the line get thicker and thinner, or is it the same everywhere?
- Does the stem curve, and does every leaf join it somewhere?
- Are the lightest areas still clean paper?
Turning fixes into habits
Each fix above is a small change in what you do first, how hard you press or where you look. None needs new tools. Work on one at a time: a week of lighter first lines, then a week of tilted flowers, then a week of varied line weight.
Old habits return when you are tired or rushing, which is normal. Progress varies with practice, and it usually shows up as fewer of these problems per page.
Frequently asked questions
Why do my flower drawings look flat?
Flatness usually comes from three things together: the flower is drawn straight from the front, every edge has the same line weight and no petals overlap. Tilting the flower onto an ellipse, thickening lines on the shadow side and letting a few petals tuck behind others adds depth even before shading.
Why are my petals uneven around the flower?
Most often the center was placed late or off to one side, so petals on one side had more room than on the other. Draw a light outer guide and mark the center first, then place petals at the top, bottom and sides before filling the gaps between them.
How do I stop smudging my pencil drawings?
Keep a clean sheet of scrap paper under your drawing hand and move it as you go. Work away from your drawing hand so it does not cross finished areas, save the softest pencil for last, and avoid blending with fingertips, which leave oily marks on the paper.