How to Draw a Tulip: An Easy Cup-Shaped Flower
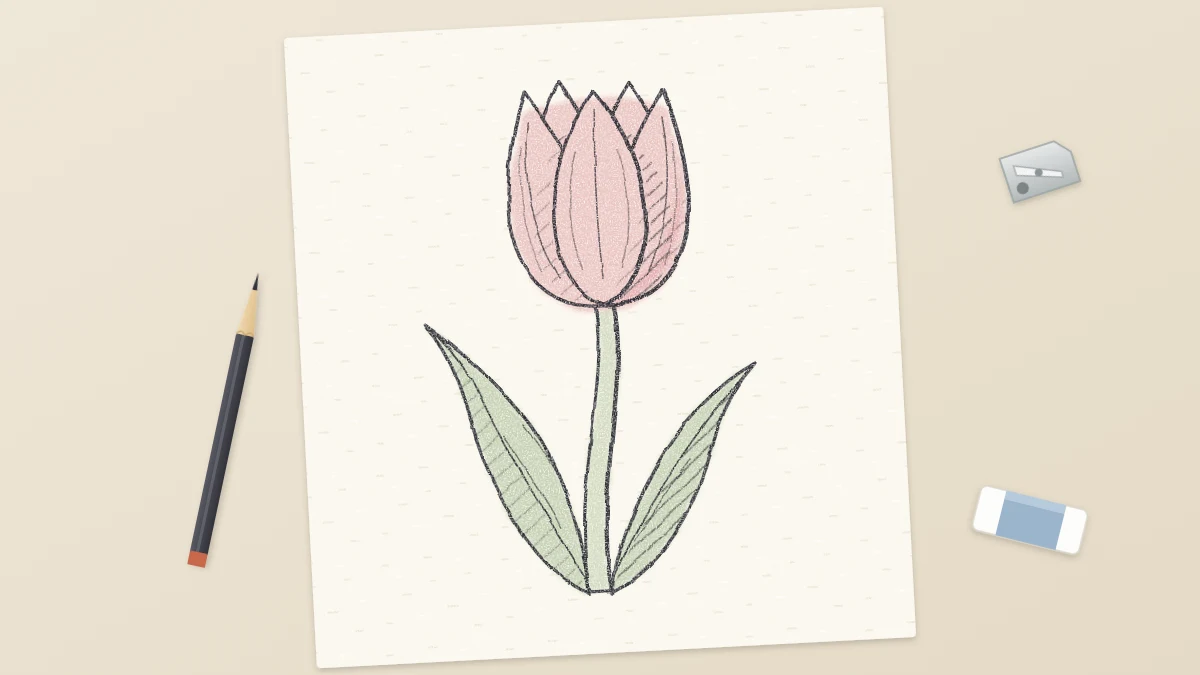
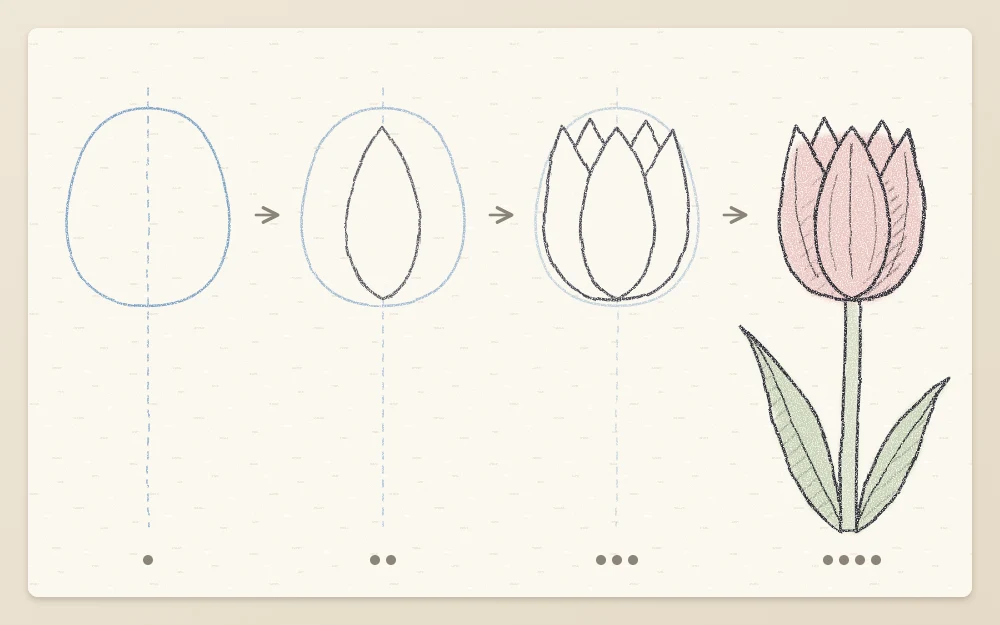
Build a tulip from an egg shape on a center line: a tall front petal, a petal wrapped around each side, back tips peeking out, then a smooth stem and long strap-like leaves.
Tutorial at a glance
What you need
- HB pencil
- 2B pencil
- Kneaded eraser
- Pencil sharpener
- Sketchbook or drawing paper
A tulip is one clear shape: a cup on a stem. There are no dozens of petals to space and no fussy center to texture, because from the side the middle of the flower is hidden. That makes it one of the most forgiving flowers to draw early on.
This guide covers how to draw a tulip in profile, starting with an egg shape on a center line and finishing with a stem and two long leaves. The petals are drawn in a set order, front first, so that each new one tucks neatly behind the last.
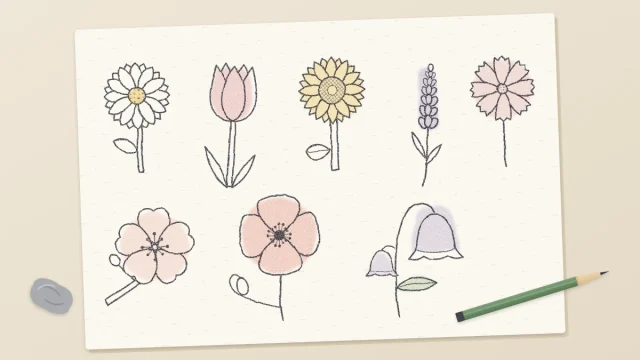
You need an HB pencil for the construction shapes, a 2B for the final lines, a kneaded eraser and a sketchbook page turned upright. A tulip has six petal-like segments, but from the side you see only three or four of them, all sitting inside one cup. That cup is one of a handful of construction shapes that most flowers are built on.
Step 1: Center Line and Egg
- With the HB and light pressure, draw a vertical line about 7 in (18 cm) long down the page. Give it a very slight curve. This is the center line for both the flower and the stem.
- At the top of the line, draw an egg shape about 2 in (5 cm) tall and two thirds as wide, with the fuller, rounder end at the bottom. The center line should pass through the middle of the egg, top to bottom.
Step 2: The Front Petal
- Start at the very bottom of the egg, on the center line.
- Draw a curve up and out to the left until the petal is about half as wide as the egg, at roughly the egg’s mid height.
- Continue the curve up and back in toward the center line, ending in a soft point just below the top of the egg.
- Mirror that line on the right side.
You have a tall pointed oval that fills the middle half of the egg. Its sides should bulge gently.
Step 3: Side Petals and Back Tips
The two side petals follow the outline of the egg and disappear behind the front petal.
- For the left petal, begin at the bottom of the egg and trace up along the egg’s left outline to about three quarters of its height.
- From there, turn the line inward and upward to a soft point at the top of the egg, slightly left of the center line.
- From that point, draw the petal’s inner edge down and toward the middle until it meets the edge of the front petal, about a quarter of the way down from the front petal’s tip. Stop there.
- Repeat on the right side, with the point slightly right of the center line. Make this tip a touch lower or higher than the left one so the two sides are not identical.
Now look at the top of the flower. Between the tip of the front petal and the tip of each side petal there is a small V-shaped gap. Fill one or both gaps with a little pointed peak, rising no higher than the side petal tips. These are the petals at the back of the cup.
Step 4: The Stem
- From the bottom of the egg, draw two lines down along the center line, one on each side of it. Together they should be about an eighth as wide as the egg.
- Keep them nearly parallel and let them follow the slight curve of the center line for a length of about two and a half eggs.
- Where the stem meets the flower, let the two lines flare out a tiny amount into the base of the cup, so the head looks attached and not balanced on a stick.
A tulip stem is smooth, with no joints or thorns. For more on curves, thickness and joining a head to its stem, see the guide to drawing stems that look natural.
Step 5: Long, Wrapping Leaves
Tulip leaves are long, smooth and strap-like, and they clasp the lower stem instead of branching off on little stalks.
- Pick a point on the stem about a quarter of the way up from the bottom. Draw a short curved line across the front of the stem there, like a collar. This is where the first leaf wraps around.
- From the left end of the collar, draw a long line sweeping up and out to the left, ending in a point about two thirds of the way up the stem.
- From the right end of the collar, draw the leaf’s other edge. It crosses in front of the stem and runs up to the same point. At its widest, the leaf should be about as wide as the egg.
- For a second leaf, start a little lower on the opposite side and make it shorter. Let its tip bend outward and down so it does not mirror the first.
The guide to matching leaf shapes to flowers compares them.
Step 6: Final Lines and a Little Tone
- Go over the contours with the 2B in long single strokes. Press harder at the base of the cup and where a side petal slips behind the front one.
- Lift the egg and the center line with the kneaded eraser.
- Add three or four fine lines on each petal, starting at the base and curving up with the petal’s edge, fading out by the halfway point. They suggest the cup’s roundness.
- Lightly shade one side of the cup and the same side of the stem so the flower looks solid.
Variations and Common Problems
The same steps cover a tulip at any stage. Only the starting shape changes.
- Closed bud: make the egg narrower, about half as wide as it is tall, and bring all the petal tips together into one point at the top. Skip the back tips.
- Classic cup: the version above.
- Open tulip: start with a bowl shape that is wider at the top than at the bottom. Let the side petals lean outward past the bowl and curl their tips away from the center. The back tips become taller and more visible.
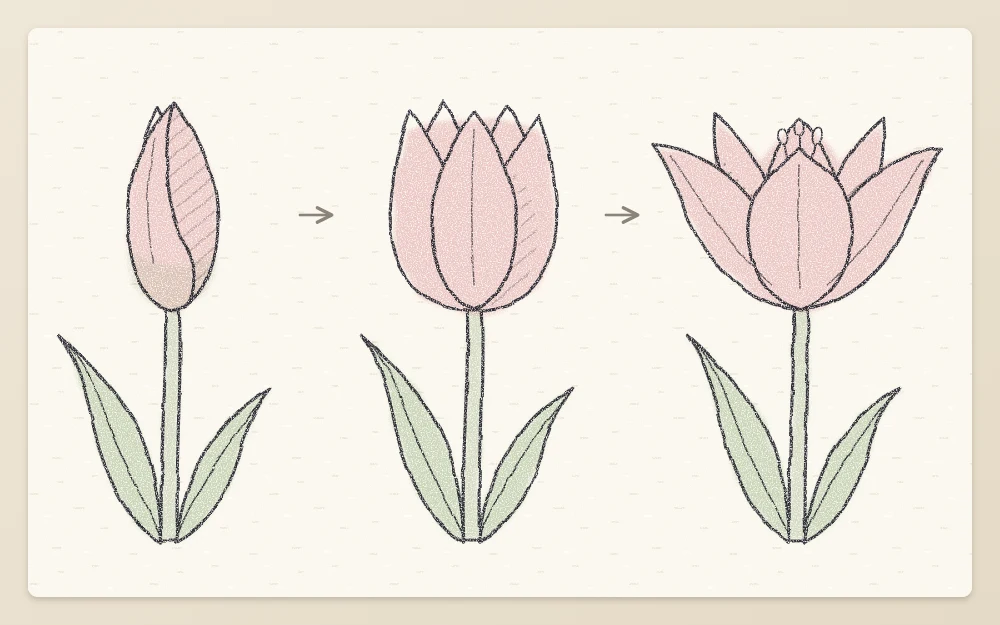
Two problems come up often. If the flower looks like a crown, the petal tips are too sharp and too even: round them and vary their heights. If the leaves look stuck on, start each one from a collar line that crosses the stem.
Frequently asked questions
How many petals does a tulip have?
A tulip has six petal-like segments, arranged as three inner and three outer. In a side view you normally see only three or four of them, because the rest are hidden at the back of the cup. Drawing one front petal, two side petals and one or two back tips is enough.
What shape do I start with to draw a tulip?
Start with a light egg shape sitting on a vertical center line, with the rounder end at the bottom. The egg sets the height and width of the whole flower head, and the center line continues downward to become the stem. A narrower egg gives a bud and a wider bowl gives an open tulip.
How do I draw tulip leaves?
Tulip leaves are long, smooth and strap-like with a pointed tip. Begin each one with a small curved line across the lower stem, then sweep two long edges upward from the ends of that line to meet at a point. Bend one leaf tip outward so the pair does not look mirrored.